


Guide to Transferring Ashes and Choosing Cremation Urns
You know, no one really prepares you for the quiet, pivotal moment after a cremation—when the urn is on the table, the temporary container is beside it, and you realize: it’s up to you to make the transfer. Why does this feel so intimidating, even if you know it’s safe? Let me tell you, the process is emotionally charged not because it’s technically difficult, but because it makes loss feel undeniable.
If you’re worried about spills, mess, or just doing it ‘right,’ you’re not alone. We’ll demystify terms like inner bag—think of this as the zip-top bag inside a cereal box—and sealing mechanism, the urn’s version of a childproof cap.
Here’s our three-act journey: first, we’ll break down what you actually receive from the crematory and why that matters. Next, I’ll guide you through a methodical, spill-free transfer—even for keepsakes and jewelry. Finally, we’ll cover sealing, troubleshooting, and when to ask for professional help.
So, why do so many families do this at home now? And if you’re saying, ‘Isn’t this what funeral directors handle?’—that’s the big shift: with cremation rates over 60%, more people are learning this skill themselves. Ready to feel prepared? Let’s get started.
What You Receive: Temporary Containers and Inner Bags
Let’s start with the basics: what actually comes back from the crematory? Usually, it’s a temporary container—often a simple plastic or cardboard box—with a sealed inner bag holding the ashes. Now, you might be thinking, ‘Are ashes just loose in the box?’ The answer: not usually. That inner bag is like the liner in your favorite cereal—it keeps everything contained and makes handling cleaner.
The technical terms here are ‘temporary cremation container’ and ‘inner bag for ashes.’ The container’s only real job is safe transport. The inner bag, sometimes zip-tied or sealed, holds the remains. If your urn is large enough, you can often place this bag directly inside without pouring. That’s a relief for many people who worry about spills or not being emotionally ready for direct contact.
So, is there a ‘right’ way to do this? It’s about comfort and fit. Some urns are designed for direct transfer, others to hold the inner bag. Picture it like kitchen storage: sometimes you keep pasta in the store bag, sometimes you decant it into a jar. The key is stability and a closure that feels secure to you.
If you’re facing a decision—inner bag or direct pour—pause and consider your long-term plan. Will you ever need to open the urn again, or is this a permanent resting place? Knowing this helps you choose the method that’s right for your family.
Setting Up for Success: Safe and Calm Workspaces
Here’s where stress melts away: preparation. Think of this step like prepping for a careful recipe—mise en place matters. Choose a stable table, lay down a tray or large box lid, and line it with paper towels. This creates a ‘contained workspace’—your insurance policy against stray grains. The technical terms? Containment and workspace stability. Imagine a painter prepping their supplies before the first brushstroke.
Now you might wonder, 'Do I need special tools?' Not really. A wide-mouth funnel or a simple scoop helps, especially with keepsake urns. Painter’s tape can steady your funnel; disposable gloves are optional, more for emotional comfort than safety. And don’t forget a damp cloth for quick cleanups.
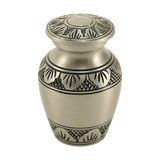
Before any ashes come out, open the urn and understand its sealing mechanism. Some urns use a threaded lid—think of it like a thermos—while others have a base plate with screws. Know what “closed” looks and feels like before you start. Why? Because fumbling with closures while emotional amplifies stress.
Let me paint a picture: you’re ready, the setup is calm, and you’ve got a trusted helper nearby. Even if you pause, nothing will roll away, nothing will spill. The goal here isn’t speed or bravery—it’s peace of mind.
The Transfer: Pouring Ashes, Handling Keepsakes and Jewelry
Now, the heart of the process: the actual transfer. Step one—open the temporary container gently and locate the inner bag. If it’s tied, untie it over your tray. If the closure’s stubborn, a carefully snipped corner creates a pour spout—think of customizing a ziplock into a pastry bag. That pour spout gives you control, just like a chef piping frosting instead of dumping a bowl.
No need to rush—transfer the ashes in slow, steady stages. Use the funnel if the urn’s neck is narrow. If you see larger fragments, don’t panic; cremated remains are mostly fine sand with occasional granules. Pouring slowly prevents ‘bridging’—where material clumps and blocks the flow. If your funnel clogs, tap it gently—never force it.
For smaller containers—like keepsake urns or cremation jewelry—a tiny spoon or even a paper cup helps portion the right amount. Picture it: one person steadies the jewelry, the other does a gentle pinch transfer. This is especially true for pet urns, where quantities are smaller but emotions are huge. If you’re splitting ashes among keepsakes, portion onto the tray first for control.
Why all this care? Because these small moments—every slow pour, every steadying breath—add up to a ritual. It’s not just a transfer; it’s an act of remembrance.
Sealing the Urn and Handling Surprises
So, you’ve transferred the ashes. What now? First, wipe any dust from the urn’s rim—just like wiping a mason jar before sealing it. For threaded lids, align and twist until snug. For base plates, tighten screws evenly, not one at a time. This ensures a stable, long-lasting seal, or what we call a 'mechanical closure.'
Now, permanent sealing: do you really want that today? Using a dedicated adhesive is common, but here’s the analogy—think of supergluing a photo frame shut. It’s not easily undone, so only seal if you’re sure the urn won’t need to be reopened. If you’re sharing ashes or might move them later, a secure but non-permanent close is wiser.
But what if something goes wrong? Maybe the urn is too small, or the closure won’t align. Stop, breathe, and don’t force it. Most families improvise: keep some ashes in the temporary container, use keepsakes for sharing, or choose a different urn. If you feel uncertain or overwhelmed—especially with fragile or expensive urns—ask the funeral home for help. They can finish the transfer or suggest solutions.
Do you feel like you should have ‘gotten it right’ on the first try? Let me reassure you: the true success is handling the process with care and respect, not technical perfection.
Summary: Three Keys to a Calm, Respectful Transfer
Let’s bring it all together. What are the top takeaways for transferring ashes into an urn? First, prepare your workspace—containment and emotional readiness are your best tools. Second, go slow and steady with the transfer—treat it like a mindful ritual, not a race. Third, know your sealing options and don’t hesitate to ask for help if things get sticky.
Here’s your concrete action step: before starting, review your urn’s closure and practice opening and closing it empty. That small prep will save you a world of stress later.
If you’re thinking, ‘But what if I’m still unsure?’—remember, you can always pause and revisit these steps, or reach out to a funeral professional for guidance. Two technical terms to recall: ‘bridging’—that pesky ash blockage in narrow funnels, and ‘mechanical closure’—your urn’s unique way of staying sealed, just like a safe.
Above all, trust yourself. The right transfer honors both the person you love and your own limits. You’re learning a skill that brings compassion and peace into the hardest moments. “Thanks for listening. Visit Funeral.com for memorial resources and thoughtful keepsakes, and follow us for more episodes. We’re grateful you’re part of this community.”


