


Transferring cremated remains into a permanent urn is one of those tasks that sounds simple and then suddenly feels heavy when you’re standing at the table with a container in front of you. If you’re searching how to put ashes in an urn, you’re not alone. Most families want the same outcome: a clean, respectful transfer with no spills and no panic.
This guide explains what you usually receive from the funeral home, the supplies that actually help, and a step-by-step method for moving cremains into an urn. You’ll also learn how to open common urn closures (threaded lids and screw bottom urn designs), how to decide whether to seal the urn, and what changes if the urn will be buried.
What You Typically Receive: Cremains in Bag Inside a Temporary Container
Before you do anything, it helps to know what you’re working with. In many cases, the funeral home ashes container is a temporary outer container holding a sealed inner bag of cremated remains. According to the Cremation Association of North America, cremated remains are transferred into a strong plastic bag and placed into an urn or a temporary container if the family has not selected an urn yet, with identification checked and a stainless identification disc placed with the remains.
That means two important things for families: first, you often do not have “loose ashes” right away; second, you can wait. The remains are secure in the inner bag until you are ready to transfer.
Tools and Supplies to Gather (What Actually Helps)
You don’t need a special kit, but a few items make the transfer calmer and cleaner. Gather everything before you open the bag.
- A large tray, roasting pan, or shallow box lid (your “catch zone”)
- Paper towels and a slightly damp cloth for cleanup
- Disposable gloves (optional; many families use them for emotional comfort)
- A wide-mouth funnel (helpful for narrow openings)
- A small scoop or spoon (helpful for keepsakes and portioning)
- A small dish for screws and caps (so nothing rolls away)
- A soft cloth or rubber jar-grip pad (for traction on threaded lids)
- The correct screwdriver (if your urn uses a screw-bottom plate)
Two environment tips matter more than tools: turn off fans and close windows (airflow moves fine mineral dust), and keep pets and children out of the room. A calm room is the best “tool” you can have.
Before You Start: Choose the Right Workspace
Work on a stable table at a comfortable height. Place the tray on the table and line it with paper towels. Put the urn and the temporary container inside the tray. If something slips, the tray keeps the mess contained and keeps you from having to “chase” ashes across the floor.
This is also the moment to decide whether you’re transferring everything into one urn or dividing into keepsakes. If sharing is part of your plan, it can be gentler to open and prepare all containers first, then portion slowly, rather than opening and closing multiple times.
Step-by-Step: How to Transfer Cremains Into an Urn Without Spills
Step 1: Open the urn first and identify the closure type
Before you open the cremains bag, open the urn. This prevents the stressful situation of having ashes exposed while you search for screws or figure out how the lid works.
Most urns open in one of two common ways:
- Threaded lid: the top twists on/off (sometimes with a gasket)
- Screw-bottom urn: the urn opens from the bottom with a plate secured by screws
Place screws, caps, or base plates in your small dish immediately. If the urn has a threaded lid, use the cloth or rubber grip to avoid scratching while you open and close.
Step 2: Decide whether to keep the inner bag intact
This is a choice many families don’t realize they have. If the inner bag fits inside the urn comfortably, you can place the sealed bag inside the urn and close it. This reduces dust, reduces stress, and keeps future options open if you later want to share a portion or change urns.
If the urn is narrow-necked, or the bag does not fit, you’ll need to pour or scoop the cremains into the urn.
Step 3: Open the temporary container and locate the bag
Set the temporary container inside the tray and open it gently. You’ll typically see a sealed inner bag. If there is an identification disc or tag, keep it with the bag and transfer it into the urn as well. CANA notes that identification is checked again and an identification disc is placed with the remains.
If the bag is tied, untie it carefully over the tray. If it’s sealed in a way that feels hard to open without tearing, cut a small controlled opening near the top edge rather than forcing a rip.
Step 4: If pouring, make a controlled spout and transfer in stages
Pinch the top corners of the bag and fold them into a simple spout shape. If the urn opening is narrow, place your funnel first. Pour slowly, pause between pours, and let dust settle. Avoid shaking the bag aggressively; that’s when small bursts of dust escape and the funnel can clog.
If the funnel clogs, tap gently. It’s normal to have a few slightly larger granules. Cremated remains are processed bone minerals, and particle size can vary slightly even after processing.
Step 5: If scooping, work in small increments
For narrow openings or for portioning into keepsakes, scooping is often steadier than pouring. Use a small scoop or spoon, and keep movements close to the tray so any stray grains stay contained.
If you are dividing, many families find it easier to portion into a small clean dish first, then fill each keepsake from that dish.
Step 6: Clean the rim and close the urn securely
Before closing, wipe the rim and threads with a dry paper towel. A clean rim allows the lid to seat properly and reduces the chance of gritty threads.
For threaded lids, tighten until secure—firm but not forced. For screw-bottom plates, tighten screws evenly rather than fully tightening one screw at a time. A balanced close helps the plate sit flush.
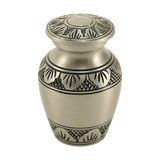
Sealing a Cremation Urn: What “Secure” Means and When to Seal Permanently
Many families ask about sealing a cremation urn because they want reassurance the urn won’t loosen over time. “Secure” can mean two different things:
- Secure close (reopenable): the lid or base is closed properly and can be reopened later if needed.
- Permanent seal: an adhesive or sealant is used so the urn is not intended to be reopened.
If you think you may need future access—because you’re sharing ashes later, planning a niche placement, or changing urns—avoid permanent sealing until you are sure. Many families choose a secure close now and a permanent seal later.
If you do choose a permanent seal, keep it minimal. A tiny amount is typically better than a thick bead, because thick adhesive can make future access destructive and can create visible mess at the seam. People often ask about silicone sealant urn lid use; if you choose silicone, use a very small bead and keep it away from visible surfaces. If your urn has a gasket, avoid applying sealant where it could interfere with gasket compression.
If you’re uncertain, it’s reasonable to ask the funeral home to seal the urn—especially if the urn is high-value, engraved, or destined for a niche with specific rules. If the urn is already sealed and you need to open it, this guide explains safe approaches and when to ask for professional help: How to Open a Sealed Cremation Urn.
Temporary Urn to Permanent Urn: What Changes (and What Doesn’t)
Families often say “temporary urn,” but what they usually mean is the temporary container returned by the crematory. The main transition is simple: the remains move from the temporary container into the urn you selected. The inner bag is often the bridge that makes the transition calmer, because it keeps remains contained during handling.
If you haven’t chosen an urn yet, it helps to size correctly first. Capacity is measured in cubic inches. Funeral.com’s urn size chart and urn size calculator can help you avoid buying too small.
Burial Urn Requirements: What to Consider If the Urn Will Be Buried
If the urn will be buried in a cemetery, burial urn requirements are often driven by cemetery policy. Many cemeteries require an urn vault or liner (an outer container sized for an urn) for ground stability and to reduce settling over time. The Federal Trade Commission explains that outer burial containers are not required by state law, but many cemeteries require them to prevent the grave from caving in. This policy logic is often applied to urn burial as well.
Practically, that means you should ask the cemetery:
- Is an urn vault/liner required in this section?
- What are the maximum exterior dimensions allowed?
- Do you require a specific vault type or installation method?
If a vault is required, the vault often provides structural protection, and the urn itself can be chosen more for meaning, closure security, and fit. Funeral.com’s guide Urn Vaults Explained walks through the requirement and planning questions.
When It’s Better to Ask the Funeral Home to Do the Transfer
You don’t need to do this yourself. Many funeral homes will transfer remains into an urn for families. Consider asking for help if the urn opening is narrow, the urn is expensive or fragile, you want a permanent seal, you’re dividing into multiple keepsakes, or you simply feel too overwhelmed to focus. The right outcome is not “I did it alone.” The right outcome is “everything stayed safe and intact.”
A Calm Bottom Line
Most cremains come as cremains in bag inside a temporary container, and you can transfer them into a permanent urn when you’re ready. Set up a catch zone, open the urn first, decide whether you can place the inner bag intact, and if you pour or scoop, do it slowly in stages. Close the urn cleanly, and only seal permanently if you’re sure you won’t need future access. If burial is planned, confirm cemetery vault rules before sealing or selecting an urn. The process can be simple—and it can be respectful—when you build in a little structure and give yourself time.


