


There’s a moment when the practical questions arrive: can you open a sealed urn, and if you can, how do you do it safely—without spills, without damage, and without turning a tender task into a stressful one. Families usually need to open an urn for one of a few reasons: to move ashes from a temporary container into a permanent urn, to transfer ashes to keepsake urn pieces for family members, to fill cremation jewelry, or to switch containers for travel or burial. And because urns are secured in different ways—threaded lids, bottom panels, gaskets, silicone, or adhesive—there isn’t one universal “right” method for how to open a cremation urn.
This guide helps you identify your urn type, explains the safest tools for each closure style, and lays out what to avoid—especially when you’re dealing with sealed metal urn opening, a silicone sealed urn, or a truly permanent seal. If you’re unsure at any point, it’s also completely reasonable to ask for funeral home help opening urn—many funeral homes will assist, and the goal is always the same: a respectful, controlled transfer.
First: Know What “Sealed” Means on Your Urn
When families say “sealed,” they can mean three different things. The first is “closed and secure” (a threaded lid or base). The second is “closed with a gasket or silicone” (extra resistance, but still designed to open). The third is “permanently sealed” (glued, epoxied, or otherwise intended not to be reopened). The safest approach is to confirm which category you’re in before you apply force.
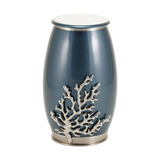
If you’re shopping for a new container, it can help to start with the plan and choose a design that matches it. For display and long-term home memorials, browse cremation urns for ashes. For family sharing or a smaller portion, keepsake urns and small cremation urns often make transfers simpler because openings are sized for careful handling.
Set Yourself Up for a Calm, Mess-Free Opening
Most spills and dents happen because people start before the workspace is ready. Think of this as a quiet, controlled “prep” moment, not a mechanical challenge. Work on a stable table with good lighting, and place the urn on a towel or non-slip mat so it can’t skid. If you’re opening the urn because you’ll be moving ashes afterward, it helps to work over a large tray or shallow box lid so any stray grains are contained.
Funeral.com’s transfer guides go deeper on setup and control—especially if you’ll be pouring or portioning—so you can keep the process steady from start to finish. See How to Transfer Ashes into an Urn and How to Fill a Cremation Urn (and What an “Urn Filler” Is).
How to Identify Your Urn Type Before You Try to Open It
Take 30 seconds and look for clues. Many urns open from the bottom to preserve a clean “vase” silhouette. Others open from the top like a jar. Some have a visible base plate with small screws. Some have a hidden plug inside the lid or under a felt pad. If you see a seam around the base, that often indicates a threaded bottom or a base panel. If you see a rubbery ring or residue at the seam, you may be dealing with a gasket, silicone, or adhesive.
If you have the product description or receipt, check for phrases like “threaded lid,” “threaded bottom,” “bottom panel,” “tamper-evident seal,” “gasket,” “silicone,” or “permanently sealed.” Those terms usually tell you which category you’re in without guesswork.
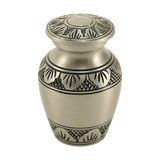
Screw-Top Urns: How to Open Without Scratching or Cracking
A threaded closure is the most common “sealed but reopenable” design. If you’re searching screw top urn how to open, start with the simplest method: add grip, not force. Use clean, dry hands and try a slow, steady twist. If it doesn’t budge, the next step is controlled traction.
A rubber jar-opener pad, a wide rubber band, or a strap wrench (the kind plumbers use for smooth surfaces) can provide leverage without chewing up the finish. For ceramic urns, avoid sudden torque; a slow, even twist reduces the risk of hairline cracks. For metal urns, avoid metal tools directly on the surface—wrap a soft cloth around the lid if you need additional protection.
If the urn has been stored in a humid area, the threads can feel “stuck” from residue, minor corrosion, or a gasket that’s tightened over time. In that case, focus on patience: stabilize the base with one hand and apply slow pressure to the lid. If it still won’t move, stop and move down to the “when to ask for help” section—forcing it is how dents and slips happen.
Bottom-Opening Urns: Threaded Bases and Screw Panels
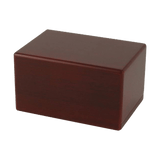
Many vase-style urns and box urns open from the bottom. If you’re learning how to open a sealed urn and the top looks seamless, flip the urn gently onto a towel and inspect the base. A threaded bottom will often have a subtle seam and may include a felt circle or cover. A screw-panel base will usually show small screws around a plate.
For a threaded base, the same “grip first” rule applies: rubber grip pads and slow torque. For a screw-panel base, use the correct screwdriver size (usually Phillips) so you don’t strip the screw head. Loosen screws gradually in a cross pattern rather than removing one side fully first—this helps the panel lift evenly and reduces binding.
Once the base is open, you may find the ashes are inside a sealed inner bag. That’s normal and helpful. If you’re planning to divide ashes into keepsake urns or place a small amount into cremation necklaces, keep the inner bag intact until your tools and keepsakes are ready, and consider reading Funeral.com’s clean-transfer walkthroughs first so you don’t feel rushed. Start with From Temporary Container to Permanent Urn.
Gasket or Silicone-Sealed Urns: What Changes
A silicone sealed urn (or gasketed urn) is still typically designed to open, but you may feel a “sticky” resistance as the seal breaks. The goal is to separate the seal evenly rather than prying one side up. Use steady twisting rather than lifting, and avoid wedging sharp tools into the seam—sharp tools scratch finishes and can chip ceramic.
If you do open a gasketed urn, inspect the gasket before resealing. If it looks torn, flattened, or brittle, you’ll want to replace it or ask the funeral home for guidance. Resealing with a damaged gasket can create the opposite of reassurance: a closure that doesn’t seat evenly and keeps making you wonder if it’s secure.
Glue-Sealed or Epoxy-Sealed Urns: Proceed with Caution
A glued urn lid removal situation is where most damage happens, because families assume it will behave like a screw-top and keep escalating pressure. Adhesive seals are often used when the intent is “do not reopen” or “open only with professional help.” If you see hardened glue at the seam, or if the lid does not rotate at all but the seam looks bonded, stop before you pry.
In many cases, the safest choice is to ask the funeral home to open it, especially if you need to access the ashes for sharing or travel. Professionals can often create access without destroying the urn’s appearance, and they can help you reseal cremation urn closures appropriately afterward.
If you choose to proceed yourself, avoid heat guns, open flames, and aggressive solvents. Heat can discolor finishes, warp adhesives unpredictably, and create safety risks around cremated remains handling. Solvents can stain metal finishes, damage lacquer, and create fumes. A gentle approach—non-marring tools, patience, and a willingness to stop if the bond doesn’t yield—is the only approach that makes sense here.
Truly Permanent Seals: When Opening Isn’t the Best Plan
Some urns are intentionally permanent: welded metal seams, permanently bonded lids, or tamper-evident designs meant for burial or long-term storage. If your urn is one of these, the “best” answer to can you open a sealed urn may be “not without damaging it.” This is when families often choose a different path: keep the permanent urn intact and transfer a portion from the temporary container (or from a secondary bag) into keepsakes, jewelry, or a travel container instead.
If the reason you’re opening the urn is to share ashes, it may be simpler to choose new keepsakes and make one careful transfer rather than forcing a permanent seal. Browse keepsake urns for small portions, or cremation jewelry for wearable tributes. If you’re unsure how much is needed for jewelry, Funeral.com’s practical guide Ashes Memorial Jewelry: How Much You Need and How to Fill Jewelry is a reassuring reference.
What to Avoid
Most urn damage comes from a few predictable mistakes. Avoid power tools unless a professional directs you. Avoid metal pry bars and screwdrivers used as levers against a finished seam. Avoid twisting by grabbing delicate decorative elements (handles, finials, or inlays) instead of the lid or base ring. Avoid opening an urn in your lap, on carpet, or on an unstable surface.
If you’re anxious, that’s not a sign you can’t do this. It’s a sign to slow down and improve the setup. Gloves, a tray, a funnel, and good lighting do more for confidence than force ever will.
If You’re Opening the Urn to Transfer Ashes to Keepsakes or Jewelry
Once an urn is open, the most respectful approach is to minimize the time ashes are exposed. Open the keepsakes first, stage your funnel or paper pour spout, and decide in advance whether you’ll pour directly or use a scoop. Families often feel steadier when they portion ashes into a small, secondary container first, then fill each keepsake slowly.
If you’re dividing remains among family members, consider pairing one primary urn with several keepsakes. The primary urn holds most remains; the keepsakes hold a symbolic portion. That’s exactly what keepsake urns are designed for, and Funeral.com’s explainer Keepsake Urns Explained
If your goal is jewelry, remember that most pieces use a very small amount. The more important decision is the closure and sealing method. If you’re wondering whether you’re “supposed” to glue it shut, read Do You Need Glue for Cremation Jewelry? before you commit to an adhesive you can’t reverse.
If Travel Is the Reason You’re Opening the Urn
Travel is one of the most common reasons families switch containers, and it’s also one of the situations where rushing can create unnecessary stress. If you’re flying, the urn needs to be screenable at security, which is why many families travel with a smaller, simpler container and keep the permanent urn safe at home. Funeral.com’s travel guidance—Flying With Cremated Remains: TSA Rules, Airline Tips, and Travel-Friendly Urns and TSA-Approved Urns: Carry-On Tips—walks through what to expect and how to choose a travel-friendly container.
If you’re transferring to travel keepsakes, small cremation urns can be a practical bridge between “temporary container” and “permanent display urn,” especially if the plan includes a later burial, scattering ceremony, or family sharing.
When It’s Best to Ask the Funeral Home for Help
It’s wise to ask for funeral home help opening urn when any of the following are true: the urn appears glued or permanently sealed, the lid is stuck and you’ve already tried gentle grip methods, the urn is fragile (ceramic or glass), you need to divide ashes among multiple keepsakes and want a calm professional setup, or you’re feeling too anxious to keep your hands steady.
It may also be helpful to know your rights around containers. The Federal Trade Commission explains that you have the right to provide the funeral home with a casket or urn you buy elsewhere, and the funeral provider cannot refuse to handle it or charge you a fee for doing so. That doesn’t mean a funeral home can’t charge for an actual transfer service (staff time is staff time), but it does mean you’re not “required” to buy your urn from one place in order to receive help.
How to Reseal a Cremation Urn After Opening
For threaded lids and bases, resealing is usually as simple as ensuring the threads are clean, the gasket (if present) is seated correctly, and the closure is snug—firm, but not over-tightened. Over-tightening can strip threads, flatten gaskets, or make the next opening harder than it needs to be. If you plan to reopen the urn again soon (for example, you’re still deciding how to divide ashes), avoid any permanent adhesive until you’re done with transfers.
If you want a walkthrough of respectful transfer and closure checks, read How to Fill a Cremation Urn (and What an “Urn Filler” Is) and From Temporary Container to Permanent Urn before you start. The calmer your process is, the less likely you are to need “fixes” afterward.
A Final Reassurance
Opening an urn is not supposed to feel like a test. It’s a practical task, and it can also be emotionally loaded. The safest approach is to identify your closure type, use grip rather than force, avoid tools that scratch or pry, and ask for help when the design clearly isn’t meant to be reopened. Whether you’re moving ashes into a permanent container from cremation urns for ashes, dividing into keepsake urns, or preparing for travel with small cremation urns, the goal is the same: a clean, steady, respectful transfer that leaves you feeling more settled—not more shaken.


