


Transferring ashes can feel intimidating, especially the first time. You’re not only handling a physical material—you’re handling something emotionally precious. If you’ve been searching how to transfer ashes into an urn or how to fill a cremation urn, the good news is that the process can be calm, clean, and respectful when you set up properly and move slowly. Most spills happen not because someone is careless, but because they start without the right tools or the right workspace.
This guide is a beginner-friendly walkthrough for moving cremated remains from a temporary container into a permanent urn or keepsake. You’ll learn what to prepare, how to use a cremation urn funnel or a transfer bag for ashes, how to split ashes into keepsake urns, and how to reseal everything securely—plus cleanup tips that keep the moment from becoming stressful.
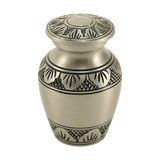
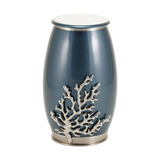
If you’re choosing an urn now, you can browse cremation urns for ashes for primary urns and keepsake urns if you plan to divide a portion for family members.
Before You Start: Know What You’re Working With
Cremated remains are dry, granular bone mineral. They can include fine powder and small fragments. They do not behave like sand exactly, and they can “puff” slightly if poured quickly. Most crematories return remains inside a sealed inner bag within a temporary container or cardboard box. Many families keep the inner bag intact and place it into the urn if the urn opening is wide enough, because that’s the cleanest, least stressful method.
If you are opening a permanent urn for the first time and you’re unsure of the closure type (threaded lid, bottom panel, silicone seal, or adhesive), read Funeral.com’s guide How to Open a Sealed Cremation Urn before you apply force. That’s the single best way to prevent scratches and frustration.
What to Prepare: Tools That Make This Cleaner
You don’t need a specialized kit, but a few simple tools can make the transfer dramatically easier.
- Disposable gloves (nitrile or latex)
- A large tray, roasting pan, or clean shallow box lid (to catch stray grains)
- A funnel or paper funnel (for smaller openings)
- A small scoop or spoon (for keepsakes and jewelry-sized openings)
- Zip-top bags or small cups (for portioning if you are splitting)
- Paper towels and a damp cloth for cleanup
- Optional: a dust mask if you’re very sensitive to fine particles
- Optional: painter’s tape to protect finishes near openings
If you’re using a very small opening, a transfer bag for ashes (a funnel bag) can help you control flow without “puffing.” Some families also use a clean sheet of paper folded into a spout as a simple alternative.
Set Up the Space: The Calm, Spill-Resistant Method
Choose a stable table with good lighting. Avoid carpet. Lay down a towel, then place your tray or pan on top of the towel. Work with the urn inside the tray so any stray grains are contained.
Keep pets and children out of the room. Silence your phone. Give yourself time. This isn’t a task to do while rushing out the door.
Place the urn on a non-slip towel so it won’t slide. If the urn is ceramic or glass, stabilize it with both hands whenever you open or close it.
Step-by-Step: How to Fill a Cremation Urn From a Temporary Container
Step 1: Open the urn and confirm the inner space
Open the urn according to its closure type. Many urns open from the bottom so the top stays seamless. If the urn uses threads, open slowly and avoid gripping delicate decorative elements.
Before you bring ashes into the workspace, check the interior. Confirm the capacity is appropriate and that the closure threads or base panel looks clean and intact. If you plan to keep the ashes bagged, confirm the opening is wide enough for the bag to pass through without forcing it.
Step 2: Open the temporary container carefully
Most temporary containers have a cardboard shell with a plastic bag inside. Open the box slowly. Do not tear aggressively. Once you see the bag, handle it gently. Many crematory bags are sealed with a tie or tape. Do not cut the bag unless you need to pour.
If your plan is “bag-in-urn,” this is the moment that saves the most stress: place the sealed bag directly into the urn if it fits comfortably.
Step 3: The cleanest method (recommended): place the sealed bag into the urn
If the urn opening is wide enough, the simplest method is to place the sealed inner bag into the urn intact. This keeps remains contained and reduces dust. It also makes future transfers easier if you ever need to share ashes into keepsakes later.
If the bag is slightly bulky, don’t force it. Forcing increases the chance of tearing. If it doesn’t fit comfortably, you have two calmer options: choose a slightly larger urn, or pour the ashes carefully using a funnel into the urn.
Step 4: If you must pour: use a funnel and pour slowly
If you’re pouring, place a funnel in the urn opening. If the opening is narrow, use a smaller funnel or a folded paper spout. Open the crematory bag carefully. Some families clip a small corner rather than opening the entire top, because it creates a controlled pour.
Pour slowly. Pause between pours. If the remains “puff,” stop and let particles settle. A slow pour is safer than a continuous dump, especially in small keepsake urns.
If you are transferring into multiple vessels, do not try to “eyeball” equal portions while pouring directly into each keepsake. It is usually calmer to portion into small cups or bags first, then fill keepsakes from those portion containers.
Step 5: Close and seal the urn
Once ashes are inside, ensure the opening and threads are free of residue. If an ash grain sits on a threaded rim, it can prevent a tight closure or cross-threading. A dry cloth or a clean brush can clear the rim.
Close the urn gently but firmly. For threaded lids, tighten until snug. Avoid over-tightening, which can strip threads or make future opening difficult. For screw-panel bases, tighten screws evenly rather than cranking one side fully first.
If you’re wondering about permanent sealing, pause. Many families want the option to reopen later to create keepsakes. If you truly want a permanent seal, follow the manufacturer’s guidance and consider asking the funeral home for help to avoid damaging threads. Funeral.com’s guide on opening sealed urns also discusses when professional help is the smarter choice: How to Open a Sealed Cremation Urn.
How to Split Ashes Into Keepsake Urns
Families often choose keepsakes for siblings, children, or to create a small bedside tribute while keeping most ashes in a primary urn. The easiest way to split is to decide on the emotional plan first, then do the portioning slowly and intentionally.
If you’re dividing into multiple keepsakes, use one of these approaches:
- Portion by container: Fill one small cup or bag for each keepsake first, then transfer each portion into its keepsake urn.
- Portion by “symbolic amount”: Decide in advance that each keepsake gets a small, meaningful portion rather than an “exact fraction,” and keep most remains together in the primary urn.
Keepsake openings are often small, which is why a small funnel or paper spout is so helpful. If you want to browse options designed for shared memorialization, start with keepsake urns and, for pet-specific keepsakes, pet keepsake cremation urns.
Cleanup Tips That Keep It Calm
Even careful transfers can leave a few grains in the tray. That’s normal. The goal isn’t “zero grains.” The goal is control and respect.
Use a dry paper towel or soft brush to gather any visible grains into a small pile and return them to the urn if you wish. Then wipe the tray with a slightly damp paper towel. Avoid using a strong vacuum, which can blow fine particles into the air. If you are in a carpeted room (not recommended), a vacuum with a HEPA filter can help, but it’s better to work over a hard surface in the first place.
Wash your hands, close the urn, and place it somewhere stable. If you feel emotionally shaky afterward, that’s also normal. Many families underestimate how tender this moment can be.
When to Ask the Funeral Home for Help
It’s reasonable to ask for professional help when the urn appears glued or permanently sealed, the lid is stuck and you don’t want to risk scratching it, the urn is fragile (glass or ceramic), or you are dividing ashes among multiple keepsakes and want a controlled setup. Many funeral homes will assist with transfers for a fee, and for many families that fee is worth the peace of mind.
If you bought your urn elsewhere, it’s still helpful to know your consumer rights. The FTC explains that you may provide your own urn and the funeral home cannot refuse to handle it or charge you a fee to do so. Federal Trade Commission (A funeral home may still charge for the actual transfer service if they provide staff time; the consumer protection is that they cannot penalize you simply for buying the urn elsewhere.)
A Quick “Do This, Not That” Summary
- Do work over a tray on a stable table; don’t work over carpet or in your lap.
- Do use the sealed inner bag method when possible; don’t cut the bag unless you need to pour.
- Do pour slowly with a funnel; don’t dump quickly into a small opening.
- Do clear ash from threads before closing; don’t over-tighten lids or force cross-threading.
- Do portion into cups/bags if splitting; don’t try to eyeball equal portions mid-pour.
A Gentle Closing Thought
Learning how to fill a cremation urn isn’t about doing something “perfect.” It’s about doing something steady and respectful, with a setup that protects you from spills and regret. If you move slowly, use a tray, and choose the sealed-bag method when possible, most transfers are cleaner than people expect. And if the urn design makes opening and closing stressful, it’s not a personal failing to ask for help. The goal is the same either way: a calm transfer that leaves you feeling more settled when you’re done.


