


The moment you decide to move a loved one’s cremated remains into a new urn can feel surprisingly tender. Sometimes it’s because the crematory returned the ashes in a temporary container, and now you’re ready for something more lasting. Sometimes a sibling asks for a small portion, and you’re trying to figure out how to share without turning the room into a scene of stress and spilled powder. Sometimes you’re honoring a pet, and the love you feel makes even a practical task feel heavy.
If it helps to know you’re not alone: cremation has become the majority choice in the United States. According to the National Funeral Directors Association (NFDA), the U.S. cremation rate is projected to reach 63.4% in 2025 (with burials projected at 31.6%), and cremation is projected to continue rising in the decades ahead. The Cremation Association of North America (CANA) also publishes annual cremation statistics drawn from state and provincial records, reflecting how common it is for families to make choices about what to do with ashes—including choosing cremation urns for ashes, sharing keepsake urns, and selecting cremation jewelry.
This guide is a calm, beginner-friendly walkthrough for how to transfer ashes to an urn—including tools, setup, closure types, sealing, cleanup, and how to portion ashes for multiple memorials without spills.
Before you begin: what the ashes are (and what they aren’t)
Cremated remains are not like fireplace ash. They’re typically a fine, sand-like powder made from processed bone fragments. They can be dusty, and the dust can cling to surfaces or puff upward if poured too quickly. They are not generally considered a health hazard in normal handling, but the goal is to keep the process clean, controlled, and respectful. Many families find it comforting to create a quiet moment—soft light, a steady table, maybe a photo nearby—so the task feels less like “transfer” and more like care.
If you’re also thinking ahead about keeping ashes at home, Funeral.com’s guide Keeping Ashes at Home: How to Do It Safely, Respectfully, and Legally can help you plan where the urn will live, how to keep it stable, and how to navigate different comfort levels among relatives.
Choosing the right urn (so the transfer is easier)
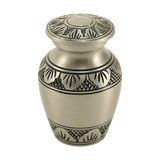
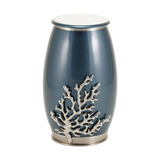
A smoother transfer starts with the right container. If you’re placing all the remains in one primary urn, you’ll usually start with cremation urns designed for full remains—like Funeral.com’s Cremation Urns for Ashes or the more specific Full Size Cremation Urns for Ashes. If you’re sharing, you might be working with small cremation urns (meant for partial remains) or keepsake urns designed for just a symbolic amount. Funeral.com’s Small Cremation Urns for Ashes and Keepsake Cremation Urns for Ashes make it easier to match capacity to your plan.
If you’re dividing ashes in a more intentional way—some in a main urn, some in keepsakes, perhaps a small amount in jewelry—Funeral.com’s Journal article Keepsake Urns and Sharing Urns: When Families Want to Divide Ashes is especially helpful for the emotional and practical side of sharing.
For pets, the same principles apply, just with different sizes and styles. If you’re honoring a dog or cat, start with Pet Cremation Urns for Ashes, or consider specialty memorials like Pet Figurine Cremation Urns for Ashes or smaller sharing options from Pet Keepsake Cremation Urns for Ashes.
The simplest setup: small choices that prevent big messes
Most spills happen for predictable reasons: a shaky container, a narrow opening, air movement, or trying to rush because you’re nervous. The fix is not complicated—it’s just about building a “safe little workspace.”
Choose a flat surface at a comfortable height, like a kitchen table. Turn off fans and close windows so there’s no airflow. Lay down a large towel or a clean sheet first, then place a shallow tray or baking sheet on top. The tray catches anything that falls, and the towel softens sound and stabilizes what you’re doing. Keep your urn on the tray the whole time.
You’ll want a few basic tools nearby. A simple funnel helps with transferring cremated remains into a narrow opening, especially for keepsake urns and cremation necklaces. A small scoop—anything from a dedicated urn scoop to a clean measuring spoon—lets you move ashes gently instead of pouring. Disposable gloves are optional, but many families prefer them for cleanliness and peace of mind. Keep a few paper towels or a soft brush nearby for dust, and have a small cup or bowl ready in case you need to set a lid down without contaminating threads or adhesive.
If you’re also filling wearable keepsakes, Funeral.com’s Urn Necklaces and Ashes Pendants: Styles, Filling Tips, and Personalization Ideas pairs well with this guide because how to fill cremation jewelry usually requires even smaller, more careful transfers.
Step-by-step: how to transfer ashes to an urn without spills
Open everything first, before any ashes are exposed
Start by opening the urn and examining its closure. Don’t assume you’ll figure it out in the moment—practice opening and closing it while your hands are clean. If the urn has a threaded lid, test that it turns smoothly and seats evenly. If it has a bottom plug, confirm you have the right tool (sometimes it’s a simple twist; sometimes it’s a snug, threaded opening). If it has a screw panel, locate the screws and set them in a small dish so they don’t roll away.
Then open the temporary container holding the remains. Many crematories return cremated remains inside a sealed plastic bag within a temporary container or box. If the bag is tied, loosen it carefully. If it’s heat sealed, use scissors to make a small cut near the top—small is important, because you can always widen it later, but you can’t “uncut” it once the opening is too large.
Position the urn for control, not speed
Place the urn on the tray and angle the opening slightly toward you. If the opening is narrow, insert the funnel and make sure it sits securely. If the urn opening is wide, you may not need a funnel, but a scoop is still helpful because it reduces airborne dust.
Now, instead of pouring from the bag in one motion, think in calm “portions.” Scoop or gently pour a small amount at a time. If you do pour, keep the bag low over the opening—closer means less distance for dust to disperse. Pause between portions, letting the ashes settle.
Keep a clean rim (this matters for sealing)
As you fill, watch the rim and threads. If ash collects where the lid needs to seat, you may end up with a gritty closure that doesn’t tighten cleanly. If you notice dust on the rim, stop and wipe it with a dry paper towel. This is one of the quiet secrets of how to seal an urn successfully: a clean contact surface.
Close the urn slowly and evenly
Once the transfer is complete, close the urn without forcing it. For threaded lids, turn backward slightly first until you feel the “threads drop,” then tighten forward. This helps prevent cross-threading. For bottom plugs, tighten until snug—over-tightening can strip threads or crack certain materials. For screw panels, tighten each screw gradually, alternating across corners so the panel seats evenly.
If you’re using a primary urn plus keepsakes, don’t feel pressured to finish every transfer in one session. Some families fill the main urn first, place it safely, and return later to fill keepsakes when they feel steadier.
Understanding urn closure types (and when adhesive helps)
Not all urns close the same way, and your sealing approach should match the design.
Threaded lids (top-opening urns)
Many metal and some ceramic urns use a threaded top lid. When properly closed, these are usually very secure. Adhesive is not always necessary, but some families choose it for long-term stability—especially if the urn may be moved, shipped, or handled often.
Bottom plugs (threaded access on the base)
Some urns (including many keepsake urns and pet keepsakes) have a bottom-opening threaded plug. These can be excellent for discrete access, but they’re also easy to forget to tighten fully because you’re working upside down. If the urn will sit on a shelf and rarely move, a snug close may be enough. If it may be transported, adhesive can add peace of mind.
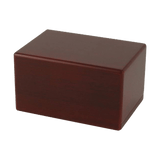
Screw panels (common in box-style urns and some pet urns)
Wooden urns and certain pet urn designs often have a removable bottom panel secured with screws. These can be very dependable because the closure is mechanical and stable. Some families skip adhesive entirely here, because the screws do the work. If you’re curious what this looks like in practice, many pet urn product descriptions explain the bottom-panel installation method, such as the closure details commonly found in Funeral.com’s pet urn listings (for example, figurine-style urns within the Pet Figurine Cremation Urns for Ashes collection).
When to use adhesive (and what kind)
Adhesive is most useful when the urn will be moved frequently, shipped, or placed somewhere a child or pet might bump it. Families also choose adhesive when they want a “final seal” after everyone has had a chance to portion keepsakes.
If you use adhesive, choose something appropriate for the urn material and closure—many families use a small bead of clear silicone or a modest adhesive designed for metal/ceramic closures. The goal is not to glue the urn shut permanently with a thick layer; it’s to add stability while keeping the closure neat. Apply sparingly, and keep adhesive away from visible surfaces. If you feel uncertain, it’s okay to skip adhesive and focus on a secure, clean closure—especially if the urn will be stored safely and handled gently.
Portioning ashes for keepsakes and cremation jewelry
Dividing ashes can be emotionally loaded because it can feel like dividing the person. It may help to reframe it: you’re not dividing love—you’re sharing a tangible symbol so different people can grieve with something steady in their hands.
Here’s a practical approach that tends to prevent spills. Start with the main urn first. Then set up each keepsake on the tray one at a time. Use a funnel and a scoop rather than pouring. If you’re filling cremation jewelry, remember the chamber is tiny—often designed for a pinch, not a spoonful. This is where slow becomes kind.
If your plan includes multiple memorial types—keepsake urns, small cremation urns, and cremation necklaces—Funeral.com’s collections make it easier to browse by purpose: Keepsake Cremation Urns for Ashes for shared portions, Small Cremation Urns for Ashes for more substantial partial remains, and Cremation Jewelry or Cremation Necklaces for wearable remembrance.
If you want extra guidance on the emotional “who gets what” part of sharing, the Funeral.com Journal article Keepsake Urns and Sharing Urns: When Families Want to Divide Ashes is one of the gentlest resources to read before you begin.
Cleanup: how to finish without feeling rattled
When you’re done, keep the tray where it is for a moment and take a breath. Most of the dust settles quickly. Use a dry paper towel to gather any loose powder into the tray. If you used a towel under the tray, fold it inward carefully so any dust stays contained. Wash hands, and if you wore gloves, remove them slowly and discard.
If there is ash left in the temporary bag because you’re waiting to decide what to do with the remainder, tie or seal it and place it in a secure, stable location—ideally inside the main urn’s box or another protective container—until you’re ready. Many families choose to take their time deciding between keeping ashes at home, scattering, or a ceremonial option like water burial.
How this connects to funeral planning and “what to do with ashes” next
Transferring ashes is often the “middle chapter,” not the end. Once the urn is filled, the bigger questions tend to surface: Will the urn stay at home? Will it go into a niche? Will some ashes be scattered later? Is water burial part of the plan? And, for many families, the budgeting questions arrive too—especially when grief and logistics overlap.
If you’re making decisions step by step, these Funeral.com guides are a steady next read, depending on what you’re considering: How to Choose a Cremation Urn That Actually Fits Your Plans (Home, Burial, Scattering, Travel), How Much Does Cremation Cost? Average Prices and Budget-Friendly Options, Understanding What Happens During a Water Burial Ceremony, and Keeping Ashes at Home: How to Do It Safely, Respectfully, and Legally.
And if you’re planning for a beloved animal, it can be comforting to know pet memorials follow the same “one step at a time” logic. Funeral.com’s Pet Urns for Ashes options include full memorials and sharing pieces, with specialized designs available in Pet Keepsake Cremation Urns for Ashes and Pet Figurine Cremation Urns for Ashes.
A gentle reminder: you can go slowly
If you feel emotional during this process, it doesn’t mean you’re doing it wrong. It means the person (or pet) mattered. The goal isn’t perfection. The goal is steadiness—protecting what you’re holding, honoring what it represents, and finishing with enough calm left in your body to exhale when it’s done.


