


Considering a diy cremation urn is more common than people admit. Sometimes it’s about budget. Sometimes it’s about aesthetics—craft stores and home décor shops sell beautiful jars, boxes, and vessels that feel more like “home” than a traditional urn catalog. Sometimes it’s about wanting something personal, handmade, or specific to the person you’re honoring. And sometimes it’s simply that an urn purchase feels like one more decision you don’t have the energy for.
A DIY or repurposed container can be a respectful choice when it’s done carefully. The key is treating it like a safety project, not a craft project. A good safe container for cremains needs the right capacity, a closure you trust, a liner system that prevents spills and moisture exposure, and a plan for what happens if the ashes will eventually be buried or placed in a niche.
This guide walks through the practical steps for repurpose container for ashes plans, what to check before you commit, and when it’s better to switch to a purpose-built urn. The goal is not to shame DIY. The goal is to keep the memorial secure and make sure your choice stays workable long-term.
Start With a Reality Check: How Cremains Are Usually Packaged
Many families assume ashes arrive “loose” and need to be poured into something immediately. In reality, cremated remains are commonly returned in a sealed bag placed in a temporary container if you haven’t selected a permanent urn yet. The Cremation Association of North America (CANA) explains that cremated remains are transferred to a strong plastic bag and placed in an urn or a temporary container if the family has not selected an urn. That sealed inner bag is your friend in a DIY plan. It adds a layer of containment and gives you time to choose without rushing.
What Makes a DIY Container “Safe” for Cremains?
When families picture a DIY urn, they often picture the outer container—a pretty box, a decorative jar, a canister with a lid. But safety is mostly about what you can’t see: containment, closure, and stability over time. A good DIY container is one that:
- Holds the needed volume with breathing room (so you’re not forcing a tight fit).
- Closes securely and consistently (not “sometimes tight, sometimes loose”).
- Supports double containment (an inner bag or liner bag inside the container).
- Won’t crack, warp, or loosen with normal indoor temperature and humidity changes.
- Can be handled without fear of the lid slipping off or the base separating.
If your plan involves any future cemetery placement, a DIY container also needs to meet cemetery urn requirements or columbarium niche rules. That’s where many DIY plans fail—not because they’re disrespectful, but because cemeteries and niches are specification-driven. A beautiful craft-store container can be the wrong shape, the wrong material, or the wrong closure for that setting.
Capacity: The One DIY Mistake That Creates the Most Stress
Before you fall in love with a container, confirm capacity. Urn capacity is measured in cubic inches. Many families use a simple estimate: plan for about one cubic inch of capacity per pound of body weight before cremation, then round up. Urns Northwest describes this as a common rule of thumb in urn sizing guidance.
For a DIY container, you can estimate capacity by measuring the interior of the container and calculating volume. Multiply interior length × width × height (in inches) for a rectangular container. For a cylindrical container, you can estimate using diameter and height, or you can use a practical shortcut: measure how many cups of dry rice or sand the container holds and convert. Urns Northwest notes a helpful conversion: one cup equals 14.44 cubic inches.
A practical reminder: you don’t need the container to be “exact.” You want breathing room. Tight fits create spills, stress, and broken lids. If your container only barely meets your estimate, it’s usually better to choose a larger container or switch to a purpose-built urn.
Closure: Choose a Lid You Trust, Not a Lid That Looks Nice
In a DIY plan, closure is often the weak point. A container can be beautiful and still have a lid that loosens if bumped, dries out over time, or was never designed for long-term security.
Closures that tend to work best for DIY containers are threaded lids (screw-top) and tight-fitting lids with a gasket. Closures that tend to create risk are loose lift-off lids, decorative lids with shallow friction fit, and lids that rely on a thin lip or a soft adhesive that can degrade.
If the container is a box, test the hinge and latch. A magnetic clasp may feel secure until the box is bumped or turned. A mechanical latch is often more reliable. If the box has no latch, consider whether you are comfortable adding one, or whether it is safer to use the box as an outer memorial display while keeping the ashes inside a secure inner container.
Use an Inner Bag or Liner Bag (Double Containment Is the Safest DIY Strategy)
The simplest way to make a DIY container safer is to keep the cremains inside the sealed inner bag provided by the crematory whenever possible. CANA describes remains being placed in a strong plastic bag before they are returned. Keeping that bag sealed inside your DIY container reduces dust, reduces moisture exposure, and makes future transfers easier if plans change.
If the original bag is damaged or you need to portion into keepsakes, you can use a secondary liner bag designed for cremains. Many families also keep a second bag around the first bag if they are concerned about moisture or if the container closure isn’t perfect.
If you want supplies that support this approach—bags, stands, plaques, and other supportive items—browse urn accessories and choose only what feels useful. The goal is not to buy a kit. The goal is to keep the remains secure.
Sealing a DIY Urn: What to Do and What to Avoid
The phrase sealing a diy urn often means “I want to be sure it doesn’t open accidentally.” The safest approach is to use a secure mechanical closure and double containment rather than relying on permanent adhesives. Permanent adhesives can create two problems: they can fail unpredictably depending on material, and they can make reopening difficult if your plan changes.
If you absolutely need extra security, a small bead of clear silicone around a seam can add stability, but treat it as semi-permanent. It can usually be cut later, but it may leave residue and can damage finishes if applied sloppily. If you think you might want to open the container later to share portions, fill jewelry, or change plans, it’s better to keep the closure secure but reopenable.
If you want a clear, step-by-step guide for transferring and sealing (including low-mess setup and cleanup), use: How to Transfer Ashes into an Urn.
Cemetery Urn Requirements and Columbarium Niche Rules: The DIY Deal-Breakers
DIY containers can work well for home display, but they often fail the moment a cemetery or niche is involved. The reason is simple: cemeteries and columbaria operate on specifications. They may require an urn made of certain materials, a secure closure, and exact exterior dimensions that fit the niche or vault.
If a niche is part of your plan, ask the cemetery for the niche’s interior height, width, and depth in writing and compare those measurements to the container’s exterior dimensions. The Federal Trade Commission defines a niche as a space in a columbarium or mausoleum to hold an urn. Niche sizing varies widely, so “it looks like it should fit” is not a reliable test. If you want a practical fit guide, see Columbarium Niche Tips.
If burial is part of your plan, ask the cemetery whether an outer container (urn vault or liner) is required. Many cemeteries require outer containers as a maintenance standard. The FTC notes that outer burial containers are not required by state law anywhere in the U.S., but many cemeteries require them to prevent the grave from caving in. A DIY container may not be compatible with the cemetery’s vault sizes or policies, which is why confirming requirements before you commit is so important.
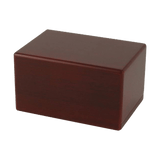
Budget Urn Alternatives That Are Safer Than “Any Decorative Jar”
If budget is your main driver, you don’t necessarily need a fully improvised container. A more reliable budget approach is choosing a purpose-built urn that still feels personal, then building a DIY memorial display around it. That gives you security without losing creativity.
If you want budget guidance and red flags to avoid when shopping online, Funeral.com’s guide Affordable Cremation Urns: Budget Options and Red Flags explains what to check (capacity, closure, returns, damage claims) so your “budget” choice doesn’t create extra cost later.
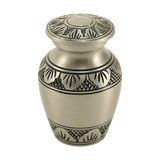
And if what you want is a simple, dignified primary urn, start with cremation urns for ashes, then narrow by size. If sharing is part of your plan, add keepsake urns for small portions rather than trying to divide into multiple DIY containers.
When It’s Better to Switch to a Purpose-Built Urn
A DIY container is usually best when the plan is stable home display and the family is comfortable with the container’s closure, capacity, and double containment. It’s usually better to switch to a purpose-built urn when any of these are true: you need a niche fit, you need a burial-compatible container, you anticipate frequent travel or handling, the container has a loose lid, the container material is fragile, or the capacity is borderline.
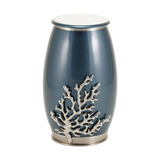
Purpose-built doesn’t have to mean “expensive” or “generic.” It can simply mean a container designed for secure closure, known capacity, and long-term handling. You can still make the memorial unique through engraving, a plaque, a photo display, or a DIY remembrance corner. If you want creative ideas that still keep containment safe, see: Unique Cremation Urn Ideas.
A Respectful DIY Approach That Works for Many Families
If you want a DIY plan that keeps safety high, one approach works especially well: keep the cremains in a secure, purpose-built inner container, and use the craft-store item as an outer memorial display. For example, you might place a secure urn inside a memory box or cabinet and build a small memorial space around it with photos and meaningful items. This approach gives you the “unique and personal” feeling without placing the ashes at risk in a container that was never designed to hold them.
If you want guidance on building a home tribute space, Funeral.com’s guide Shrines, Altars, and Memorial Spaces offers practical, respectful ideas that work well with either a traditional urn or a discreet container.
A Calm Bottom Line
A DIY urn can be safe and respectful when it is planned carefully: verify capacity, choose a closure you trust, keep double containment with an inner bag, and store the container in a stable, dry location. The moment a niche or burial plan enters the picture, DIY becomes riskier unless the container meets specific requirements. If your plan is home display and you want a budget-friendly, personal look, DIY can be a good fit. If your plan involves a cemetery, columbarium, travel, or long-term handling, a purpose-built urn is usually the safer choice.
The simplest standard to hold onto is this: you can be creative with the outer memorial, but you should be conservative with containment. When the ashes are secure, the memorial can be as unique as your love makes it.


