


Opening a Sealed Cremation Urn: What You Need to Know
When and Why Families Open Sealed Cremation Urns
“Welcome to the Funeral.com podcast — where we combine compassionate conversation with practical guidance on cremation, burial, memorial planning, and remembrance. Our goal is to help you make informed decisions during life’s most difficult moments.”
Have you ever wondered why someone would even want to open a sealed cremation urn? Let me tell you, it’s rarely about curiosity or meddling. Life moves on, plans change, and sometimes, the original memorial plan just doesn’t fit anymore. Maybe you need to transfer ashes to a new urn, perhaps for a family member who moved or to better suit a columbarium niche. Or maybe siblings are sharing, and it’s time to split ashes into keepsakes. These aren’t just hypotheticals—they’re real, emotional scenarios facing more and more families as cremation becomes the norm.
Now, you might be thinking: 'Isn’t an urn supposed to be permanent?' Well, permanence is a spectrum in this world. Some urns are designed to be opened and closed, while others are more secure—or even labeled as 'permanently sealed.' But even then, permanent rarely means indestructible. It simply means 'please don’t open without care.'
So if your family ever faces this crossroads, remember: it’s completely normal to revisit your plans. The need to open an urn is almost always a sign of care and evolving remembrance, not disrespect.
Decoding Urn Seals: Threaded, Screwed, or Glued?
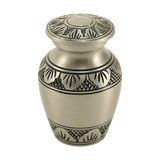
Picture this: you’re holding a beautiful urn, but you have no clue how it’s actually closed. Is it a simple twist-off, or is there some industrial-strength adhesive involved? The first technical term you need to know is 'threaded lid.' That’s like the classic jar—you twist, it opens. Most metal urns use this design, and when you twist gently, the lid comes right off. But sometimes, a tiny set screw (think of it like a mini Allen bolt) is hiding near the rim. If you don’t spot it, you could be twisting forever.
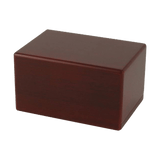
Now, wood urns often use a 'bottom-load plate,' which is basically a panel on the underside, held in place with screws. The advantage? The opening isn’t obvious, and you get great stability for home display. But you’d better have the right screwdriver handy—stripping a screw creates more headache than honor!
But what about glue? Adhesive closures are common in ceramics and some metals. You might see a slim glossy line around the edge or feel a tacky seam. Here’s the dilemma: too much force, and you risk damaging a priceless keepsake. Not enough, and it won’t budge. And then there’s the 'permanently sealed' label. In reality, almost any urn can be opened by a professional, but at home, it’s a risk/reward calculation.
So, before you even think about opening, take a detective’s approach: inspect the closure, look for seams or screws, and light it well. One wrong guess, and you might do more harm than good.
In summary, always match your method to your urn’s closure type. It’s the difference between a respectful transfer and a permanent mishap.
Safe Setups: How to Prevent Spills and Regret
Let’s get real: the number one fear when unsealing an urn is that something will spill. I hear you—no one wants that moment. But here’s where preparation takes center stage. The technical term here is 'containment zone.' What does that mean in plain English? It’s just a stable surface—think a sturdy table—with a towel or tray to catch any stray grains. The whole goal is control, not chaos.
Before you even touch the urn, gather your tools: clean, dry hands or nitrile gloves for a sure grip, a rubber jar-opener for traction, and the correct screwdriver or Allen key if screws are involved. No blades, no solvents, and definitely no heat guns—those are for the professionals!
Now you might ask, 'Isn’t this all a bit much?' But trust me: a calm, methodical setup is your insurance policy. If the only tools you reach for are grip-based, not force-based, you’re already lowering the risk.
Picture this: you unscrew the lid, and inside is a sealed plastic bag containing the remains. That’s actually standard, and it means you can often verify contents without exposure. If you’re just checking, open, look, and reseal—don’t overcomplicate it.
In the end, a little setup saves a lot of stress. Make your workspace work for you, not against you. It’s one part process, one part peace of mind.
Gentle Techniques for Different Urn Closures
Alright, let’s talk specifics—because how you open an urn depends entirely on its construction. Start with a threaded lid. Here, 'cross-threading' is your enemy. It’s when the grooves don’t line up, making the lid feel glued when it’s just stuck. Solution? Even, slow twists with a rubber grip. If it loosens, open slowly and keep the urn upright.
Bottom-load plates are next. They use multiple screws in a panel underneath. The trick is to loosen them evenly and keep those tiny screws in a dish—trust me, you don’t want to lose one mid-transfer! Once open, don’t rush. Many remains are inside a sealed bag, so you’re not directly touching ashes. 'Bag-first' transfer is the safest, meaning you move the sealed bag rather than pour. Think of it like moving flour in a ziplock, not scooping sugar from a bowl.
Set screws, those tiny little anchors, require the correct tool—usually an Allen wrench. Don’t force it. Loosen, don’t remove, then try the lid again. If it’s still stuck, step back. Better to stop than to strip a screw or chip a finish.
Adhesive-sealed lids? This is where patience meets wisdom. If gentle hand pressure and improved grip don’t budge it, don’t escalate. For glass and ceramic urns especially, prying or heating can cause irreparable damage. In these cases, it’s often safer to let a funeral professional take over.
To sum up: match your method to the closure, go slow, and when in doubt, stop early. Respect for the remains—and for the urn itself—is the top priority.
Legal and Emotional Considerations: Know When to Seek Help
Now, you might be wondering: 'Is it even legal for me to open this urn?' Here’s the honest answer—most of the time, yes, as long as you’re the authorized decision-maker or have the family’s blessing. That said, there are a few practical steps to protect everyone involved. Always label remains and containers immediately when dividing or transferring. If you’re traveling, the TSA requires urns to be X-rayable, and if you’re mailing, the USPS insists on a sift-proof inner container with tough outer packaging. Those are your technical terms of the day: 'X-rayable' and 'sift-proof.'
Emotionally, this process is weighty. If you’re hesitating, it’s not a sign of weakness—it’s a sign of care. There’s no shame in asking a funeral home for help, especially if the urn is adhesive-sealed, has hidden screws, or is made from fragile material like glass or high-gloss ceramic. Sometimes, ten minutes with a professional saves you hours of stress—and preserves both the ashes and the urn’s finish.
And if you’re thinking of filling memorial jewelry, like a cremation necklace, know that these pieces are designed for at-home fills, often using threaded closures or tiny screws. Just follow the maker’s instructions, use minimal adhesive, and you’re golden.
Here’s my advice: when in doubt—whether for legal, cosmetic, or emotional reasons—pause and get a second opinion. This is a once-in-a-lifetime task; it’s worth doing right.
Ultimately, whether you open the urn yourself or call in the experts, the guiding principle is respect—for your loved one, for the memorial object, and for your own peace of mind.
After Opening: Resealing, Memorial Choices, and Moving Forward
So, you’ve opened the urn—now what? One of the most common questions I hear is: 'Do I need glue to reseal it?' The answer? Not always. If you have a threaded lid or a screw-secured plate, a snug fit is often all you need. For those who crave extra security, a tiny bead of adhesive may bring comfort. But beware—overusing glue can make future changes nearly impossible and may even damage the finish.
Let’s think bigger-picture. Sometimes, opening an urn signals a shift in your memorial plan. Are you moving to a new keepsake, sharing with family, or creating cremation jewelry? Make sure your containers are the right size—keepsake urns typically hold a symbolic portion, while full-size urns hold all the remains. Choosing by purpose (display, burial, sharing, or travel) can make those next steps feel manageable.
You might be asking, 'What if I’m not ready to make it permanent?' Great question. Many families leave options open, keeping ashes at home for now and deciding on burial or scattering later. That’s why flexibility matters—today’s decision doesn’t have to lock in your future.
Quick legal checklist: ensure you’re the authorized person, label everything as you go, and follow official shipping or travel guidelines if needed. And if you’re planning a water burial, remember, you’ll need to report it to the EPA within 30 days.
In the end, what matters most is care—care for the remains, for the urn, and for your family’s comfort. Opening an urn can be a gentle transition, a new chapter in memorializing someone you love. Do it thoughtfully, and you’ll never regret taking the extra care.
“Thanks for listening to the Funeral.com podcast. For trusted resources, memorial products, and planning support, visit Funeral.com. Follow us for more expert insights and meaningful conversations about honoring life.”
Read the full article here: Can You Open a Sealed Urn? What to Know Before You Unseal, Transfer, or Split Ashes


