

There’s a particular kind of heaviness that shows up when you realize you need to open an urn. Maybe your family is ready to split ashes into multiple keepsakes. Maybe you’re moving cremains into a new container. Maybe you’re adding a small keepsake note, a photo, or a piece of fabric from a loved one’s favorite shirt. Whatever brought you here, you’re not doing anything “wrong” by asking how to do it carefully.
At the same time, it helps to name the truth upfront: a sealed urn is usually designed to stay closed. Many families never open one again once the ashes are placed inside. So if you’re going to do it yourself, your goal is not “getting it open fast.” Your goal is keeping the space calm, preventing dust, avoiding spills, and making it easy to reseal the urn for long-term keeping ashes at home in a way that feels secure and respectful.
One more reassurance before we get practical: cremated remains are not a biohazard in the way people sometimes fear. The “risk” most families deal with is emotional, and the second risk is purely practical—fine, dry material that can drift if you rush or if you create airflow. That’s why a safe setup matters more than strength.
When you should not DIY (and what to do instead)
If the urn is a rare heirloom, has visible cracks, or seems fragile (thin ceramic, cracked stone, an old glued lid that might splinter), consider asking a professional for help. A local funeral home can often assist with transfers or splitting ashes. If the urn came from a crematory or funeral home recently, you can also ask them what closure type was used and whether the lid is threaded, press-fit, or sealed with adhesive.
Also pause if you’re doing this because you feel pressured to “finish” something quickly. If the room is full of people, if you’re short on time, or if you’re doing it late at night in a tight space, that’s when mistakes happen. It’s okay to choose a different day.
Why this topic matters now
More families are handling urn decisions at home simply because cremation has become the majority choice in the U.S. The Cremation Association of North America (CANA) reports a U.S. cremation rate of 61.8% in 2024 and projects it will keep rising. The National Funeral Directors Association (NFDA) also reports continued growth in cremation preference and projections. When cremation is common, so are the very normal “second-step” questions—like how to split ashes into keepsake urns, how to choose small cremation urns, or how cremation jewelry fits into the plan.
If you’re still deciding what container you ultimately want, you can browse Funeral.com’s cremation urns collection and the focused category for cremation urns for ashes. For sharing among relatives, it’s also common to pair a primary urn with keepsake urns or small cremation urns, depending on how much each person will receive.
Set yourself up for a clean, calm transfer
The biggest “hack” is not a special tool—it’s creating a workspace that makes spills unlikely. Pick a stable table with good light. Turn off fans and HVAC vents if you can. Keep pets and kids out of the room. And give yourself more time than you think you’ll need.
If you want a gentle walkthrough of the bigger picture—how home storage works, why transfers feel emotional, and what families usually do next—Funeral.com’s article on keeping ashes at home is a reassuring companion.
A compact “tool kit” that covers most urns
- Nitrile gloves (for grip and cleanliness)
- A large, clean towel or soft blanket (to protect the urn and table)
- Masking tape and a marker (to label bags or portions)
- Microfiber cloths and a small bowl of water (for damp wipe cleanup)
- A plastic sheet or disposable table covering (optional but helpful)
- Rubber strap wrench (best for threaded lids without scratching)
- A thin plastic putty knife (safer than metal for many finishes)
- Zip-top bags or temporary containers (if you’re splitting portions)
- An urn funnel kit or wide paper funnel (to prevent spills)
If your goal is to create wearable keepsakes, you may also want to look at cremation jewelry and cremation necklaces—just know that filling jewelry is a “tiny opening” job, and the calmer your setup is, the better it goes. Funeral.com’s Cremation Jewelry 101 explains how pieces typically seal and what families should expect during filling.
Know what you’re opening: common sealed urn types
“Sealed” can mean a few different things, and the method matters because you’re trying to open the urn without gouging it, cracking it, or creating dust.
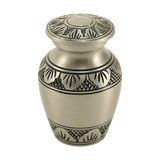
Threaded lid (twist-off top)
This is common in metal urns and some stone or engineered materials. It looks like a screw-top, sometimes with a visible seam. Many families assume it’s “glued” when it’s really just tight.
Wrap a soft cloth around the lid for grip, or use a rubber strap wrench. Press down gently as you turn to keep the threads aligned. If it doesn’t move, don’t escalate to force immediately—try a slow, steady approach, and consider a second person holding the base to prevent tipping. Avoid pliers; they scratch and can deform metal.
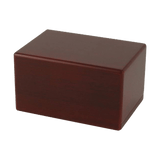
Bottom panel (screws or plate)
Some urns load from the bottom. You’ll see a felt-covered base or a plate with screws. This style is often easier for transfers because you can keep the visible “front” untouched.
Place the urn on its side on a towel. Remove screws carefully and keep them in a small dish so nothing rolls away. When you replace the panel, align it gently; overtightening can strip threads in wood or composite materials.
Press-fit lid (tight friction seal)
Some ceramic and wood urns use a snug lid that lifts off. The seal can feel “stuck” due to humidity, finish, or slight swelling over time.
Use a thin plastic putty knife to work around the seam a millimeter at a time. Think “slow circle,” not “pry and pop.” If you feel the lid flexing or hear cracking, stop and reassess.
Glued or silicone-sealed lid
This is the situation most families mean when they say “sealed.” The urn may have adhesive, silicone, or epoxy on the seam. The goal here is to soften or separate the seal without damaging the finish.
Start with the least aggressive approach: a thin plastic tool around the seam, slow and patient. A hair dryer on low can sometimes warm certain sealants enough to help (keep it moving, never concentrated heat, and don’t overheat an urn). If you’re dealing with a high-strength epoxy, it may be better to stop and ask a professional rather than risk cracking the urn.
How to open the urn without spilling (the “catch zone” method)
Before you open anything, build a catch zone. Spread a plastic sheet or disposable cover on the table. Put a large towel on top so the urn doesn’t slide. If you have a shallow tray or baking sheet, set it under the work area to catch any stray material. The point is to make your workspace forgiving.
When the urn is open, look for an inner bag. Many urns contain a sealed bag inside, and your job is easier if you can lift the bag out intact rather than pouring loose ashes. If the bag is sealed with a tie, keep it upright and support the bottom with your hand.
If you need to pour, do it like you’re pouring flour—slowly, close to the receiving container, and with as little drop distance as possible. That’s where a funnel kit helps. If you’re splitting portions, label each container first so you’re not juggling open vessels in the moment.
For families planning multiple keepsakes, it can help to choose the right destination containers before you start. Some people use a primary urn plus multiple keepsake urns. Others prefer slightly larger small cremation urns so each home has a stable memorial, not just a token portion.
Cleanup: what to do if there’s dust or a spill
First, don’t panic. Most spills are small, and they feel bigger than they are because of what the ashes represent. The safest cleanup is usually the simplest: damp wipe, slow movements, and no airflow.
Use a slightly damp microfiber cloth to gather material. Avoid sweeping with a dry broom (that can lift dust). Many families instinctively reach for a household vacuum, but that can disperse fine particles through the exhaust and make the mess feel worse. If you do choose to vacuum, a true HEPA-rated setup is safer than a typical household vacuum; OSHA defines what HEPA means in its safety materials and standards, which can be a useful reference point when you’re evaluating equipment. For most families, though, damp wipe and careful transfer is enough.
If ashes got onto fabric, shake it outdoors only if you can do so far from people and open windows—and only if you’re comfortable with that emotionally. Otherwise, fold the fabric inward to contain the material and launder separately. The main idea is containment.
Resealing the urn for long-term storage
Once the transfer is complete, resealing is about two things: keeping the lid secure and keeping the urn stable in its long-term home. If you’re planning to store the urn at home for years, think about where it will live. The safest placement is stable, dry, and protected from accidental bumps—exactly the kind of practical guidance covered in Funeral.com’s resources on keeping ashes at home.
Threaded lids: seal without making it impossible later
If the urn has a screw-top lid, you usually don’t need glue. Tighten it firmly by hand, then add a small strip of clear tape along the seam if you want a simple “tamper-evident” indicator. Some families also use a thin layer of thread tape (the kind used in plumbing) to reduce loosening over time, but don’t overdo it—your future self may need to open it again for a move or family request.
Press-fit lids: stabilize and reduce shifting
If the lid presses in, you can often reseat it securely with gentle pressure. If you want added peace of mind, a small bead of removable silicone or museum putty can help stabilize without permanently bonding the lid. Avoid aggressive adhesives unless you are confident you will never need to open the urn again.
Glued lids: choose a sealant intentionally
If the urn was originally sealed with adhesive and you want to reseal it, choose a sealant based on your real goal. If the goal is “secure but reversible,” a removable silicone is more forgiving than epoxy. If the goal is “permanently closed,” epoxy is stronger but far less reversible and can damage finishes if you ever need to reopen. Either way, apply sparingly and clean any squeeze-out immediately with a cloth, because dried adhesive on a finished urn is hard to remove cleanly.
How this connects to the bigger plan: keepsakes, pets, and what to do with ashes
Most families don’t open an urn because they’re “fiddling.” They open it because the plan changed—someone moved, siblings live in different states, or a family member realized they want a small portion close. That’s where the broader landscape of what to do with ashes comes in.
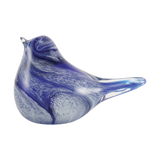
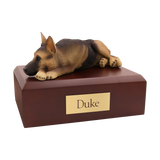
If you’re sharing portions, browse keepsake urns and small cremation urns. If you’re memorializing a companion animal, Funeral.com’s pet urns for ashes collection includes a wide range of pet cremation urns, including pet figurine cremation urns and pet keepsake cremation urns for families who want to share portions.
If your family is also weighing scattering or a ceremony on water, it’s worth knowing that water burial has real rules when it’s done in U.S. ocean waters. The U.S. Environmental Protection Agency (EPA) provides burial-at-sea guidance under the Marine Protection, Research and Sanctuaries Act. Funeral.com’s Journal also has practical, family-centered explanations of water burial planning so you don’t have to translate regulatory language while you’re grieving.
And because real life includes budgets, it’s normal for the urn plan to change based on cost. If you’re trying to make decisions that are both meaningful and financially realistic, Funeral.com’s guide on how much does cremation cost can help you understand how urns, keepsakes, and memorial items fit into the bigger picture.
One last gentle tip: make the moment smaller
Families often expect urn opening to feel like a “procedure.” Sometimes it’s quieter than that. Sometimes it’s just you at a table, taking a breath, and moving slowly. If you want to add a note, do it before the ashes are exposed. If you want to play music, do it softly—just enough to settle your hands. And if you feel overwhelmed halfway through, it’s okay to pause, cover the opening, and return when you’re steady again.
FAQs
-
Is it legal to open a sealed urn at home?
In most situations, families are allowed to possess cremated remains and handle them at home. The practical issues are usually about safety and respect (preventing spills, storing securely) rather than “permission.” Rules are more likely to matter when you move into scattering, burial, or water placement. If you’re considering a sea ceremony, review the EPA’s burial-at-sea guidance and follow local rules for other locations.
-
What’s the safest way to remove a glued urn lid?
Start with the least aggressive method: a thin plastic tool around the seam, slowly working in a circle. Gentle warmth from a hair dryer on low can help some sealants soften, but avoid concentrated heat and stop if you hear cracking. If the urn is valuable or fragile, professional help is often the safest choice.
-
How do I transfer ashes without spilling?
Build a catch zone (towel over a protective cover, tray underneath), reduce airflow, and work slowly. If there’s an inner bag, keep it upright and supported. If you must pour, keep the drop distance short and use a funnel kit or wide paper funnel. Label containers first so you’re not juggling open vessels.
-
How should I clean up cremation ashes if some spill?
Use a slightly damp microfiber cloth and slow movements to avoid stirring dust. Avoid dry sweeping and be cautious with household vacuums, which can spread fine particles through exhaust. Containment and damp wiping are usually enough for small spills.
-
How do I reseal the urn after opening?
For threaded lids, a firm hand-tighten is usually sufficient; avoid permanent glue if you may need to reopen later. For press-fit lids, reseat carefully and consider a reversible stabilizer if desired. For lids that were originally sealed with adhesive, choose between reversible silicone (more forgiving) and epoxy (strong but difficult to reopen) based on your long-term plan.
-
Does TSA allow flying with an urn if it’s sealed?
TSA guidance emphasizes that the container must be able to be screened by X-ray; if the container is opaque on X-ray, it may not be allowed through the checkpoint, and TSA typically will not open the urn to verify contents. Review the TSA cremated remains guidance before travel and consider using a screenable temporary container if needed.


