


There’s a moment that catches many families off guard: the urn arrives, the temporary container is on the table, and suddenly you’re thinking, “I’m supposed to do this myself?” If you’re feeling nervous, that’s normal. Transferring cremated remains is not complicated, but it is emotionally loaded, and it’s easy to imagine a mess you can’t undo. The good news is that a clean, no-spills transfer is mostly about creating the right environment—steady surfaces, no airflow, a wide “catch zone,” and a method that keeps you from rushing.
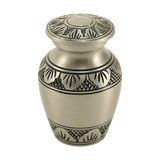
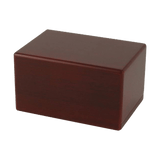
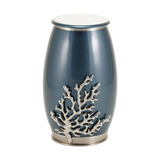
This guide walks you through how to transfer ashes into an urn in a way that is practical, respectful, and as low-stress as possible. If you’d rather shop first and come back to the process later, these pages help you match the container to your plan: cremation urns for ashes, full size cremation urns for ashes, keepsake urns, and cremation jewelry.
Before You Start: What’s Usually Inside the Temporary Container
Most cremated remains are returned in a temporary container with the remains contained inside an inner bag. That bag may be tied, secured, or sealed, and it may include an identification tag or disk. In other words, you’re rarely dealing with loose remains right away. The cleaner your transfer feels, the more confident you will be—and that starts with keeping the inner bag intact until you are ready to place it into the urn.
If you want a deeper walkthrough of what “temporary container to urn” looks like and why the inner bag matters, this companion resource is helpful: How to Transfer Ashes Into a Cremation Urn.
The No-Spills Approach in One Sentence
A clean transfer happens when you control three things: where the remains can possibly go if something slips, how much airflow is moving around your workspace, and whether you’re forced to “hover and pour” without support. When those are controlled, even people who feel shaky can do this without a single spill.
Tools That Actually Help (and What You Can Skip)
You do not need specialized equipment to do this well, but the right few items make a big difference—especially if you’re transferring into a narrow opening, a keepsake, or cremation jewelry. Many families prefer a simple urn filling kit approach: gloves, a scoop, and a funnel for ashes, plus a cleanup plan that assumes “just in case” without expecting the worst.
| Tool | Why it helps | When it matters most |
|---|---|---|
| Nitrile gloves | Keeps hands clean and reduces the urge to stop mid-transfer to wash up. | Any transfer, especially when you may pause or get emotional. |
| Wide tray or shallow box (lined) | Creates a “catch zone” so nothing reaches the floor if something slips. | Always. This is the single best no-spill safeguard. |
| Funnel (wide-mouth if possible) | Guides remains into narrow openings without hovering and guessing. | Keepsakes, narrow urns, and cremation jewelry. |
| Scoop or clean spoon | Gives control over small amounts and reduces “dumping.” | Portioning into multiple containers. |
| Painter’s tape | Stabilizes a funnel or protects an urn rim from accidental scuffs. | High-polish urns or very narrow openings. |
| Soft cloth + slightly damp paper towel | Handles light dusting and wipe-down without smearing. | Cleanup and finishing touches. |
| Optional mask | Useful if you’re sensitive to dust or anxious about fine particles. | If the inner bag is opened and the remains are very dry and dusty. |
If you want a more detailed look at tools (including what an “urn filler” is and why funnels vary), this article pairs well with the process below: How to Fill a Cremation Urn (Tools, Tips, and Clean Transfers).
Setup: Make the Space Work for You
Choose a workspace that is stable, private, and free from airflow. A dining table is often better than a kitchen counter because it gives you room to work and to set items down without balancing them. If your home has strong HVAC airflow, turn off fans, close nearby vents if you can, and keep windows closed for this short window. Air movement is one of the biggest causes of “unexpected mess,” and it is completely avoidable.
Now build your no-spill safety net. Place a wide tray or shallow box on the table and line it with clean paper. The goal is not to create a sterile environment; the goal is to make the worst-case scenario easy to manage. When the tray is there, your nervous system relaxes, and your hands steady naturally because you’re no longer trying to perform perfection.
Before you touch the temporary container, open and inspect the urn itself. Confirm how it opens, where the threads are (if it’s threaded), and whether it fills from the top or via a bottom panel. Place the urn inside the tray, open and ready. If the urn has a threaded lid, set it aside in a predictable location so you’re not searching for it later. If the urn has a bottom plate, make sure you have the screwdriver or tool needed for reattachment and that the screws are in a small dish, not on the table where they can roll away.
The Transfer: Two Clean Methods Depending on Your Goal
The cleanest method depends on whether you are placing the sealed inner bag into the urn (common with many full-size urns) or opening the bag and transferring portions (common for keepsake urns and cremation jewelry). The goal is not to follow a rigid rule, but to choose the method that minimizes handling.
Method One: Placing the Inner Bag Into the Urn (Lowest Handling)
If your urn is sized for the full remains and the opening is large enough, this method is typically the simplest. With gloved hands, gently lift the inner bag from the temporary container and lower it into the urn while both are sitting inside the lined tray. If the bag is bulky, you can guide it in slowly rather than forcing it. The key is that the urn stays stable and the bag stays supported the entire time. Once the bag is seated, close the urn without rushing and set it aside.
This is often the best approach for families who want to avoid any direct contact with the remains and who do not need to divide portions immediately.
Method Two: Portioning Into an Urn, Keepsakes, or Jewelry (Controlled Small Amounts)
If you are dividing ashes, the secret is to work in small amounts and always keep your containers inside the tray. Place your funnel into the urn opening (or keepsake opening) and stabilize it with one hand or a small strip of painter’s tape if needed. Open the inner bag only as much as necessary to access a manageable portion. A scoop or clean spoon gives you control and reduces the chance of a sudden “slide” that can happen when a bag is tipped too far.
As you transfer, pause frequently and gently tap the funnel if you notice clogging. Avoid shaking the urn or funnel aggressively. Most “spills” happen when someone tries to speed up a slow flow. A calm pace is faster in the end because it prevents cleanup interruptions and stress spirals.
If you are filling cremation jewelry, treat it as its own separate task rather than adding it into the middle of the main transfer. Many families find it easier to complete the main urn first, close it, and then return to the jewelry in the same tray setup with fresh paper, better lighting, and a slower pace.
Cleanup: What to Do If There’s Dust or a Small Spill
Even when nothing “spills,” you may notice light dust on the tray paper or around the funnel. The easiest cleanup is also the most gentle: fold the paper inward slowly so any material stays contained, then place it into a bag for disposal. Avoid sweeping or vacuuming fine material from hard surfaces, because that can put particles into the air. A slightly damp paper towel is usually enough for a final wipe-down of the tray and the urn exterior, followed by a dry soft cloth to prevent streaking.
If you do have a small spill inside the tray, the tray has done its job. Move slowly, keep airflow minimal, and scoop material back into the urn using your funnel. This is why working inside a catch zone matters: it turns an “oh no” moment into a simple correction.
Closing and Sealing: When “Secure” Is Enough and When You Should Seal
Once the urn is filled, close it carefully and confirm the closure is fully seated. For a threaded lid, tighten until snug and aligned; overtightening can sometimes create cross-threading or stress on the closure. For a bottom plate, reattach evenly and confirm screws are secure.
Whether you should choose a permanent seal depends on your plan. If the urn will stay in a stable spot at home and won’t be handled often, a secure closure is often sufficient. If the urn is going into a columbarium niche, being shipped, or handled frequently, sealing can add peace of mind. If you want a deeper guide on the options—tape vs silicone vs epoxy vs gaskets—this companion article is designed for that decision: How to Choose a Permanent Seal for an Urn.
When to Ask the Funeral Home to Help (and Why It’s a Smart Choice)
There is no “gold star” for doing this yourself. Asking the funeral home for help is often the most practical decision, especially when the emotional weight is heavy or the container is expensive. Many funeral homes will transfer remains into an urn for you, and in some cases they will also seal it if that is your preference.
It is especially reasonable to ask for help when you are transferring into a high-value urn you would be devastated to damage, when the urn has a very narrow opening, when you are dividing remains among several relatives, or when you want a clean, sealed, ready-to-place result for a niche or cemetery setting. It is also a good idea if your hands shake, you have limited mobility, or you simply know that the stress of the process will linger afterward.
If you are managing a household with kids and pets or you don’t have a calm, private workspace, a funeral home transfer can remove a surprising amount of pressure. You can still be present for the meaning of the moment without taking on the mechanics.
The Bottom Line
A no-spills transfer is not about being “careful enough.” It’s about setting up a workspace that makes spills unlikely in the first place. When you use a wide tray catch zone, reduce airflow, work on a stable surface, and transfer in small, controlled amounts, you can transfer ashes into an urn cleanly and confidently. And if you want the simplest path, it is completely appropriate to ask the funeral home to do the transfer and sealing—especially when multiple containers, travel, or tight openings raise the stakes.
If you are still choosing a container that matches your plan, start here: cremation urns for ashes. If your plan includes sharing, start here: keepsake urns. If your plan includes a wearable memorial, start here: cremation jewelry.


