


When a family chooses cremation, there is often a quiet moment later that no one warns you about: the moment the temporary container is on the table, the urn is nearby, and you realize you’re the person who has to make the transfer. If you’re feeling nervous, that’s normal. Even though cremated remains are stable and safe to handle, the act of putting ashes into an urn can feel emotionally intense—because it makes everything feel real in a new way.
Cremation is now the most common form of disposition in the United States, and it continues to grow year over year. According to the National Funeral Directors Association, the U.S. cremation rate is projected to reach 63.4% in 2025, with projections rising further over the coming decades. The Cremation Association of North America reports a 2024 U.S. cremation rate of 61.8%. Those numbers explain why more families are learning practical skills once reserved for funeral professionals—like how to transfer ashes into an urn calmly, safely, and with as little stress as possible.
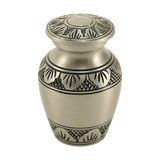
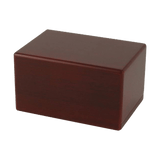
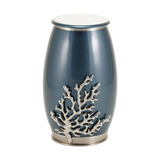
This guide walks you through a simple, controlled process you can do at home, along with sealing tips and answers to common questions like are ashes loose in an urn, what an inner bag for ashes is, and when it’s wiser to ask the funeral home for help. Along the way, we’ll also point you to gentle options if you’re still deciding between cremation urns for ashes, small cremation urns, keepsake urns, pet urns for ashes, or cremation jewelry.
What You Usually Receive: The Temporary Container and the Inner Bag
Most crematories return remains in a simple, practical package: a temporary cremation container (often a cardboard or plastic box) with a sealed bag inside. That sealed bag is the inner bag for ashes. Some families expect loose ashes in the container, but in many cases the remains are already secured in a bag, sometimes with a tie, a zip closure, a seal, or a combination.
So, are ashes loose in an urn once you transfer them? They can be, but they don’t have to be. Many families place the inner bag directly inside a larger urn if it fits comfortably, or transfer the contents into the urn and then secure the urn with its own closure. The “right” choice is the one that matches your urn design, your comfort level, and what you want long-term—especially if you plan on keeping ashes at home for years.
A Calm Setup Matters More Than Perfect Technique
The transfer tends to go well when you treat it like a careful kitchen prep moment: stable surface, contained workspace, and a slow pace. The goal is not to be brave. The goal is to make it easy to pause, breathe, and continue without mess or regret. If you have a second person you trust—someone quiet and steady—invite them to be present. Not to rush you, but to hold the urn steady, hand you paper towels, or simply sit with you.
Step One: Prepare a “Contained” Workspace
Choose a table at a comfortable height where you can stand without hunching. Place a large tray, shallow storage-bin lid, or even a clean cardboard box lid on the table to contain any stray grains. Line it with paper towels. Set the urn on the tray and make sure it sits flat and stable. If the urn opens from the bottom, place it upside down only after you’ve confirmed it won’t wobble.
If you are transferring into an urn with a narrow neck, set the funnel in place before you open anything else. A wide-mouth funnel is ideal, but a properly sized funnel for cremation ashes (or a purpose-made cremation urn transfer kit) can reduce stress significantly when the opening is small. The point is to prepare the urn first, so the ashes never “wait” in the open while you look for parts.
Step Two: Gather a Few Tools That Actually Help
You do not need specialized equipment to do this respectfully, but a few items make the process calmer and cleaner:
- A wide-mouth funnel or a simple cremation urn transfer kit (especially for narrow openings or keepsakes)
- Disposable gloves (optional; some people prefer them emotionally, others prefer clean bare hands)
- A small scoop or spoon (helpful for keepsakes and jewelry)
- Painter’s tape (to stabilize the funnel and protect rims)
- Paper towels and a slightly damp cloth for cleanup
- A small dish for screws, caps, or base plates so nothing rolls away
If you do not have a kit, you can still do a good DIY urn transfer. The process is about containment and patience, not fancy tools.
Step Three: Open the Urn and Identify How It Seals
Before you open the temporary container, open the urn and understand its closure. Some urns have a threaded lid. Some have a bottom plate secured by screws. Some have an inner lid plus an outer lid, or a gasket that helps create a tighter fit. Your goal is to know what “closed” looks like before the ashes are involved—because that’s when people get flustered and lose small parts.
If your urn is designed to be permanently sealed, pause here and decide whether you truly want that today. Sealing a cremation urn permanently can be a comfort for many families, but it also means you should assume it will not be reopened easily later. If your plan includes splitting ashes later, sharing keepsakes, traveling with a portion, or future cemetery placement, you may prefer a secure close now and a permanent seal later.
The Transfer: A Slow, Controlled Method That Avoids Spills
Step Four: Open the Temporary Container and Locate the Bag
Set the temporary container on the tray beside the urn. Open it slowly, then locate the inner bag. If the bag is tied, untie it carefully over the tray. If it is sealed in a way that feels difficult to open without tearing, don’t force it. You can cut carefully near the top edge, creating a controlled opening. The goal is to avoid a sudden rip that makes the bag collapse or spill.
Step Five: Create a “Pour Spout” and Transfer in Stages
Instead of opening the bag wide, pinch the top corners and fold the bag into a simple spout shape. That spout gives you control. If you are transferring into a full-size urn, you may be able to pour directly with a funnel in place. If you are transferring into a smaller opening, use the funnel and pour slowly, pausing between stages so dust settles and the funnel doesn’t clog.
If the ashes include a few larger fragments (which is normal), don’t panic. Most cremated remains look like a fine, pale sand with occasional small granules. Pouring slowly prevents “bridging,” where material temporarily blocks a narrow opening. If the funnel clogs, tap it gently or use a clean spoon handle to encourage movement—never shake aggressively.
Step Six: When the Inner Bag Fits, You Can Place It in the Urn
Some families prefer not to pour at all. If the urn is large enough and the inner bag fits without forcing, it is acceptable to place the sealed inner bag inside the urn. This approach can feel emotionally easier and also makes future changes simpler if you are not ready for permanent decisions. It is especially common with larger cremation urns, where the bag can sit comfortably without crumpling.
The decision comes down to the urn’s interior space and your long-term plan. If you want to add an identification card, a note, or a small keepsake item, an inner bag can still work well—just keep additions separate and respectful, not loose in a way that might snag the bag.
Special Situations: Keepsakes, Pet Urns, and Cremation Jewelry
Not every transfer is “full remains into one urn.” Modern memorialization is often about flexibility: a primary urn plus one or more keepsakes, or a portion set aside for jewelry, or a small container used while the family decides what to do next. That’s where small cremation urns and keepsake urns can be genuinely practical—not as an “extra,” but as a plan that matches real life.
Pet Urn Filling: Gentle, Small-Scale Transfers
Pet urn filling can be emotionally difficult because the return amount may be smaller than expected, even when your grief feels enormous. Many families choose a dedicated pet cremation urns design, and some find comfort in a memorial that looks like a piece of home décor, such as a figurine-style urn from the pet figurine cremation urns collection.
Practically, small transfers benefit from a scoop-and-funnel approach. Work in “pinches,” not scoops, and consider portioning first into a clean paper cup on the tray, then transferring from the cup into the urn. If your family plans to share a portion, pet keepsake urns can help you share without improvising with containers that weren’t made for this moment.
Filling Cremation Jewelry and Cremation Necklaces
Cremation jewelry is often one of the most comforting options for daily life because it doesn’t require a public display; it simply keeps someone close. It is also the most delicate to fill because the chamber is small. If you are filling cremation necklaces, work over the tray, use the smallest funnel you can, and aim for a tiny pinch at a time. Many families find it easiest to have one calm helper hold the piece steady while the other handles the ashes.
If you want a deeper walkthrough on jewelry filling and safety, Funeral.com’s guide Cremation Jewelry 101 explains how these pieces are designed and what “secure sealing” looks like in everyday wear.
Sealing the Urn Securely: What “Closed” Should Feel Like
Once the transfer is complete, wipe the rim and threads with a dry paper towel so the lid seats cleanly. For urns with a base plate, align it carefully and tighten screws evenly rather than forcing one screw fully at a time. A level, even close helps the seal feel stable and prevents wobble.
If you are choosing a permanent seal, follow the urn manufacturer’s guidance. Some families use a small bead of adhesive designed for this purpose; others prefer a non-permanent close until the family is confident the plan will not change. If your question is specifically about sealing a cremation urn and you’re unsure what your urn is designed for, it is reasonable to ask for help rather than guessing. A funeral home can often assist quickly, and the peace of mind is worth it.
One important caution: if the urn is permanently sealed and you later try to undo it, you can damage the finish or the closure mechanism. If you are searching for how to open sealed urn designs, treat that as a sign to slow down and ask for professional help—especially if the urn is meant to be displayed long-term or has sentimental, irreplaceable value.
If Something Doesn’t Go as Expected, You Still Have Options
If the urn seems too small, stop before forcing it. Capacity issues are common, especially when families choose a decorative urn without realizing how much space the full remains require. In that situation, many families keep the temporary container closed and shift plans: use a full-size urn for the primary portion and select keepsake urns for sharing, or choose an urn designed for larger capacity from the broader cremation urns for ashes collection.
If you want help choosing a container that matches your plan—display at home, burial, scattering, or future sharing—Funeral.com’s guide Choosing the Right Cremation Urn walks through materials, sizing, and sealing decisions in plain language.
Where This Fits in the Bigger Picture of Funeral Planning
For many families, the transfer is not the end of the story. It’s one step in a larger set of choices about remembrance: whether you will create a home memorial, schedule a ceremony later, share keepsakes among siblings, or plan a release in nature. That broader context is part of funeral planning, and it’s one reason people choose flexible options like small cremation urns, jewelry, or multiple containers while the family decides what to do with ashes.
If your plan includes the ocean, it helps to know that families use the term water burial in different ways, from scattering on the surface to using a water-soluble vessel designed to release the remains gradually. Funeral.com’s guide Water Burial and Burial at Sea clarifies the language and helps families plan the moment with less uncertainty.
Cost is also part of planning, especially when families are balancing grief with real budgets. If you are asking how much does cremation cost, you are not being insensitive—you are trying to make decisions your future self can live with. The NFDA statistics page reports a national median cost of $6,280 for a funeral with viewing and cremation in 2023, and Funeral.com’s guide Cremation Costs Breakdown explains common fees and add-ons so you can compare quotes with more confidence.
When to Ask the Funeral Home for Help
You are not failing if you decide this is not a DIY moment. Consider asking for help if the urn opening is very narrow, the urn is expensive or fragile, you feel too overwhelmed to focus, or the temporary container is difficult to open. It is also wise to ask for assistance if you are splitting ashes among multiple keepsake urns and cremation necklaces, because portioning is where most spills happen.
If you want an additional walkthrough written in the same calm tone, you can reference Funeral.com’s related guides, including How to Fill a Cremation Urn and Keeping Ashes at Home. Many families find that reading one more set of instructions reduces anxiety—not because the process is complicated, but because grief makes even simple tasks feel heavy.
Above all, remember this: you can do this slowly. You can pause. You can ask for help. And you can choose the option that matches your life right now—whether that’s a full-size memorial from cremation urns, a more compact plan using small cremation urns, a shared approach with keepsake urns, a pet memorial from pet urns, or a daily keepsake through cremation jewelry. The “right” transfer is the one that feels steady, respectful, and true to the person—or pet—you love.


