


The moment you bring cremated remains home is often quieter than you expected. There may be no grand ceremony—just a cardboard box or temporary container in your hands and a question that feels both technical and tender: how to transfer ashes into an urn in a way that is clean, respectful, and free of spills. With a steady surface, the right tools, and a calm approach, you can complete this task with dignity, whether you’re placing all the remains together or dividing a portion into smaller keepsakes.
More families are navigating this domestic urn transfer because cremation continues to be the most common choice for disposition in the United States. According to the National Funeral Directors Association, the U.S. cremation rate is projected to reach about 63.4% in 2025 and continues to grow over the coming decades, a reflection of changing preferences, costs, and cultural attitudes toward funeral planning and memorialization.
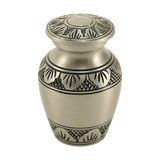
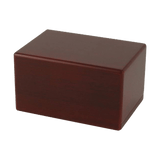
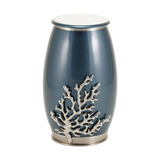
In this guide, we’ll walk through a calm, step by step urn filling method that minimizes mess, explains what tools are genuinely useful, and highlights when it might be smarter to ask the funeral home to help. Along the way, we’ll also gently connect you with options for cremation urns for ashes, small cremation urns, keepsake urns, and other thoughtful memorial choices on Funeral.com.
Understanding What You Receive From the Funeral Home
Before you begin, it helps to know what you’re holding. Most crematories return remains in a sturdy temporary container with a sealed inner bag inside. This inner bag holds the cremated remains—sometimes called cremains or ashes—and is typically secured with a zip tie or clip. If you’re wondering what to do with ashes at this stage, know that the remains are already in a controlled package designed for transport.
Because most domestic transfers start from this sealed inner bag, the cleanest method—when the urn opening allows—is to place that sealed bag directly into the urn. That avoids loose dust and reduces the chance of spills entirely. If the bag doesn’t fit, you’ll pour the contents into the urn slowly and carefully. Funeral.com’s How to Put Ashes Into an Urn: Step-by-Step Filling, Closing, and Sealing Tips offers a practical walkthrough that matches exactly this kind of situation.
Gathering the Tools That Make a Difference
You don’t need a specialized kit, but a few simple supplies make the transfer calmer and cleaner rather than stressful or chaotic. Most spills happen not because someone is careless, but because they started without a wide “catch zone” or the right support under the urn. Here are the essentials to prepare before you open anything:
A stable table with good lighting; a large tray or shallow box lid to act as your “catch zone”; disposable gloves (optional but helpful for emotional comfort); a wide-mouth funnel for narrow openings; a small scoop for portioning into keepsakes; paper towels or a slightly damp cloth for cleanup; and a small dish for any hardware like screws or caps.
Having everything in place before you open the inner bag changes the experience from “winging it” to “controlled and respectful.” Often the most peaceful approach is the one that feels steady under your hands.
Step-by-Step: How to Transfer Ashes Into an Urn Without Spills
The following sequence is designed to make the transfer feel like a series of calm, controlled actions rather than a high-pressure task. Take your time; you’re creating a resting place for someone you love.
Step 1: Choose and Prepare the Space
Select a sturdy, flat surface such as a dining table or kitchen counter. Clear the space of distractions, lay down protective material (butcher paper or even a clean towel), and place your tray or work zone beneath where the urn will sit. Keep pets and children out of the area to reduce unexpected movement.
Step 2: Open the Urn First
It may seem backward, but open the urn before you touch the temporary container. Confirm that the interior space is appropriate and that the closure mechanism (threaded lid, bottom panel, or screws) works smoothly. Set the urn inside your tray or bin so any accidental stray particles stay contained.
Step 3: Open the Temporary Container Carefully
Slowly remove the lid of the temporary container. Inside, you’ll typically find the sealed inner bag of remains, often with an identification tag or disc attached. Keep the bag sealed until you’re ready to transfer—this controlled approach helps prevent dust from drifting into the air.
Step 4: The Least Stressful Path: Bag-In-Urn Where Possible
If the urn’s opening is wide enough, the easiest approach is to place the sealed inner bag into the urn intact. This method removes the need to pour and dramatically reduces the risk of spills. It also keeps the process simple and focused on intention rather than technique.
Step 5: Pouring Slowly When Necessary
If the bag won’t fit, place a wide-mouth funnel into the urn opening and open just enough of the bag to permit a controlled pour. Clip a small corner or loosen a tie instead of opening the entire bag at once—small, slow pours are far easier to manage than a large rush. Pause frequently so the remains can settle, and always keep the tray beneath to catch anything that might escape.
Step 6: Portioning for Keepsakes and Cremation Jewelry
If you’re split ashes into keepsakes or filling cremation jewelry pieces such as pendants and bracelets, it helps to pour a small amount into a secondary container first. Scoop measured portions into smaller urns or jewelry holders one at a time. This staged approach reduces stress and helps you keep portions even and intentional.
Step 7: Closing and Sealing the Urn
Wipe the rim or threads of the urn with a dry cloth before closing. Even a tiny ash grain can interfere with a tight seal. Close according to the urn’s design—threaded lids should be snug but not over-tightened. If you intend to bury the urn or place it in a niche later, consider whether you want to add a sealant or adhesive based on your plans and the material of the urn.
When It’s Smarter to Ask the Funeral Home to Do the Transfer
There is no “award” for doing this yourself. If the idea of transferring ashes feels too heavy, if the urn opening is exceptionally narrow, or if you simply want the peace of mind that a professional handled it, ask the funeral home to do the transfer. Many will perform that service for you and may also seal the urn if that aligns with your plan. A thoughtful funeral planning professional can take that technical burden off your shoulders so you can focus on memory and meaning. Funeral.com’s related Jeopardy® article explains this option clearly and compassionately.
After the Transfer: Keeping Ashes at Home or Beyond
Once the urn is filled and sealed, you can begin to think about where it will rest. Many families choose to keep the urn at home in a quiet, intentional space. Funeral.com’s guide on keeping ashes at home offers practical advice on placement, safety around children and pets, and how to create a memorial nook that feels comforting rather than burdensome.
Others combine a home memorial with scattering a portion in a meaningful place, burial in a cemetery or garden, or even a water burial ceremony on a favorite shoreline. Whatever your plan, the act of transferring ashes into an urn is simply one step in the broader rhythm of funeral planning and grief support.
Final Thoughts
Handling your loved one’s cremated remains is an act of love—an intimate, gentle step in the process of memorialization. With a calm workspace, a few useful tools, and a deliberate, paced method, you can complete the transfer without stress or mess. Whether you choose to do it yourself or ask for professional help, the goal is not technical perfection but a respectful place for memory to rest and for your family to find peace.


