


The first time most families realize they might need to split cremation ashes is not during planning—it’s later, when the temporary container is on the table and everyone is finally in the same room. Someone clears their throat and says what a few people have been thinking: “I’d like to keep a small portion.” Another person asks, quietly, “Is it even okay to do that?” And suddenly the practical question—how to divide cremation ashes—is tangled up with love, grief, fairness, and the fear of doing something wrong.
The good news is that dividing ashes can be done safely, cleanly, and with real dignity—either at home or with help from a funeral home. What matters most is creating a calm plan before you start, choosing containers that fit your goals, and keeping simple records so everyone feels confident later.
Start with the “why” and the “who” before you touch anything
Before you open the container, pause and name the purpose. Are you sharing ashes with siblings so each household has a keepsake? Are you planning one main urn plus a few smaller keepsakes? Are you dividing ashes for jewelry (which usually requires only a pinch) while keeping the majority together?
This conversation can feel awkward, but it prevents misunderstandings that can last for years. It helps to decide who will keep the primary urn (if there is one), how many portions are needed and what each portion will go into (urns, keepsakes, jewelry), whether anyone wants a portion for scattering later, and whether anyone has religious or cultural concerns about separating remains.
If there’s tension, you can still move forward—just slow down. It’s often easier to agree on a “main resting place” and then divide smaller portions from the remainder, rather than treating every portion as identical.
Consider whether a funeral home should handle the division
Many people assume splitting ashes at home is the default. It doesn’t have to be. A funeral home can help if you want clean, professional portioning (especially for multiple urns), sealing and labeling handled for you, a witness option (some families find this comforting), or simply less stress if emotions are running high.
There’s no shame in delegating this. Asking for funeral home help with dividing ashes is common, and it can be the simplest route when several people are involved or when you’re portioning ashes into jewelry or multiple keepsakes.
That said, plenty of families do this at home successfully—especially when the division is straightforward and everyone is comfortable.
Prep your space like you’re doing something important—because you are
Whether you divide ashes at home or you’re transferring portions after a funeral home has prepared them, your environment matters. Choose a time when you won’t be interrupted and a place where you can work slowly.
A good setup is simple: a sturdy table at a comfortable height, a large tray or baking sheet to catch any stray granules, a disposable table covering for easy cleanup, bright lighting, and a calm “no pets / no kids / no rushing” boundary for the room.
If the remains are in a temporary plastic container inside a cardboard box, keep the container inside the tray while opening. That tray is your safety net.
Tools that make dividing easier (and safer)
You don’t need anything elaborate, but the right tools prevent mess and make portions more consistent. Many families use disposable gloves, a dust mask if they’re sensitive, a small funnel for urns and keepsakes, a micro funnel for jewelry (often included with kits), a clean spoon or scoop dedicated to this purpose, heavy-duty zip-top bags for temporary holding if needed, and labels with a permanent marker. If consistency is a concern, a digital scale can help.
A note on measuring portions of ashes: ashes vary in texture and density. If you try to portion strictly by weight, you may find it fiddly. Many families prefer to portion by container size (fill each keepsake to the appropriate level) or by visual fairness (similar volumes). If fairness is a sensitive issue, using a scale can help everyone feel reassured—but don’t let “perfect equality” turn into a stressful, mechanical moment. Aim for “reasonable and respectful.”
Step-by-step: how to divide cremation ashes at home
Once your space is prepared and your containers are ready, you can move slowly through the process.
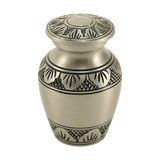
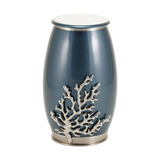
Gather and label containers first. Before opening the ashes, line up each urn, keepsake, or temporary bag and label it with a simple identifier (for example: “Mom—Keepsake for Ana,” “Dad—Jewelry portion for Marcus,” “Main urn”). This is the heart of labeling multiple urns: do it before anything is poured, while your hands are clean and your mind is clear.
Open the container inside your tray. Keep the opening pointed away from your face. If there’s an inner bag tied with a twist tie, open it gently and keep it low in the tray.
Decide your portioning method. Choose one approach and stick with it. Some families fill the main urn first and divide what remains into smaller portions. Others measure out the small portions they need (especially for jewelry) and then transfer the majority into the main urn. If there is no primary urn, you may divide the ashes into similar volumes (and/or weights) for each person.
Most families find “keepsakes/jewelry first, then main urn” works best because tiny portions are easier to take from a fuller container than from an almost-empty one.
Transfer slowly with a funnel. Place the funnel into the receiving container. Use a scoop or spoon to guide the ashes into the funnel in small amounts. If a small bone fragment appears (sometimes called “cremains fragments”), don’t panic—this can be normal. If it won’t pass through, set it into the receiving container with the scoop rather than forcing it.
Seal each container as you finish it. Close the lid or cap firmly. If the container uses a threaded closure, ensure it’s seated correctly. For keepsakes, some families add a tiny strip of tape around the seam temporarily until they’re ready to permanently secure it (depending on the product’s design).
Pause between portions. After each portion is complete, take a breath, check the label, and set it aside in a safe spot. It prevents mix-ups and keeps the moment calm.
Clean up carefully—no vacuuming. If you have a few stray granules, fold your table covering inward so the ashes remain contained. Wipe the tray with a damp disposable towel. Avoid sweeping or vacuuming, which can send fine particles into the air.
Dividing ashes for jewelry: tiny amounts, big meaning
If you’re dividing ashes for jewelry, the portion needed is usually very small—often less than you expect. Use a micro funnel and work over a tray. If the jewelry kit includes a small tool or scoop, use it. If you’re nervous, portion the jewelry amount into a small labeled bag first, then fill the jewelry piece from that bag. This gives you a second chance if your hands shake or the funnel tips.
One respectful practice: keep a small “buffer” portion aside in a labeled bag (for example, “Extra—Jewelry backup”). It can relieve anxiety if you later decide to add another piece or if one portion spills.
Record-keeping: the quiet step that prevents future stress
Record keeping for divided ashes doesn’t need to be formal, but it should exist. Families often wish they had done this later—especially if someone moves, passes away, or a keepsake is handed down.
A simple note (paper or digital) can include the deceased’s full name and date of death, the date the ashes were divided, who received which portion or container, any identifying number from the cremation paperwork (if available), where the primary urn is kept (if there is one), and notes about any planned scattering or future transfer.
This isn’t about bureaucracy. It’s about peace of mind.
Etiquette: are ashes “gifts”?
People sometimes talk about portions as “giving ashes as gifts,” but it’s more sensitive than a gift. A portion of cremated remains is a responsibility—and it should always be offered with consent, not surprise.
A respectful approach is: “Would you like a keepsake portion?” rather than “I saved some for you.” If someone says no, believe them. They may change their mind later. If you’re the one distributing portions, consider keeping one extra labeled keepsake urn empty (or a small reserved portion) so you can respond kindly later without reopening old conflict.
If you’re shipping a portion to a sibling, don’t improvise. Use a secure container, label clearly, and follow shipping rules that apply in your area. When in doubt, let the funeral home handle shipping.
Safety basics worth repeating
Even though cremation ashes are generally not a “biohazard,” safety when handling ashes is still important. Wear gloves if you prefer, avoid breathing dust (a mask helps if you’re sensitive), keep food and drinks away from the work area, keep children and pets out of the room, and work slowly in a tray with a funnel.
Most accidents happen when people rush, get interrupted, or try to do it “quickly” on a cluttered surface.
A final word: make it practical, but let it be meaningful
Dividing ashes is one of those tasks that sits at the intersection of the everyday and the sacred. You’re doing something deeply practical—portioning, sealing, labeling—and at the same time, you’re making a decision about how love is carried forward in multiple homes and multiple lives.
If you want, you can mark the moment with something small: a shared story, a quiet minute, a candle, a simple phrase like “May we carry you with us.” Then you close the containers, write down what you did, and you’re done—not perfectly, but respectfully.
And that’s the goal: not perfection. A safe, careful process that honors the person and supports the family who remains.


