


It’s a surprisingly common moment: you are holding an urn that looks finished, settled, “done,” and yet you still have a practical need. Maybe you want to confirm the closure is secure before placing it on a shelf. Maybe siblings are sharing ashes and you need to divide them into keepsake urns. Maybe you are filling cremation jewelry or cremation necklaces. Maybe you are moving remains from a temporary container into a permanent urn. Or maybe you are planning a scattering or water burial ceremony and realize the urn in front of you is sealed tighter than you expected.
If you are searching open sealed cremation urn, the “how” is only half the story. The other half is the fear of doing something wrong—damaging the urn, spilling ashes, or feeling like you disrespected someone you love. This guide is written to keep you safe, protect the urn, and give you the confidence to pause and ask for professional help when the risk starts to outweigh the benefit.
It also helps to name why this question is showing up more often. Cremation is now the majority choice in the U.S. According to the National Funeral Directors Association, the 2025 cremation rate is projected to be 63.4%. The Cremation Association of North America reports a 61.8% U.S. cremation rate in 2024. When more families choose cremation, more families also find themselves navigating practical “after” questions like what to do with ashes, how to handle an urn at home, and how to share remains respectfully.
Why Urns Are Sealed in the First Place
A sealed urn is not meant to be mysterious. It is meant to be protective. Seals reduce the risk of accidental spills during transport, storage, or handling. They also create a sense of completion for some families: the urn is “closed,” the remains are “safe,” and the memorial feels more settled.
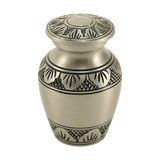
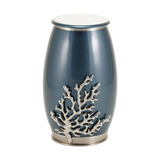
Most urns use one of three common urn sealing options: a threaded (twist) lid, a set screw, or an adhesive seal. Some urns also have a bottom panel (often with felt) that opens rather than a lid. The challenge is that these closures can look very similar from the outside, especially when decorative bands or snug machining hide the seam.
And this leads to one of the biggest misconceptions: are urns permanently sealed? Many urns are sold as “sealed” or “secure,” and some are described as “permanently sealed.” In practice, “permanently sealed” usually means “not intended to be reopened at home without risk,” not “physically impossible to reopen.” A funeral home can often open and re-secure an urn safely, and a jeweler may open a keepsake compartment for memorial jewelry when appropriate. The right question is less “Can it be opened?” and more “Should I open it myself?”
Identify the Closure Before You Attempt Anything
The safest way to avoid damage is to treat the urn like you would treat an unfamiliar medicine bottle: read it first, then touch it. If you cannot confidently tell how the urn opens, do not force movement. Start with a slow inspection in good light.
- Look for a visible seam around the top rim (often indicates a threaded lid).
- Run your fingertip along the rim and the shoulder of the urn to feel for a recessed groove (common with twist lids).
- Check for a tiny hole along the rim or side (often indicates a set screw).
- Look under the base for a felt pad, screws, or a removable bottom panel (common with some wood and metal urns).
- Notice residue: a glossy line, hardened clear material, or tacky edge can suggest sealed urn adhesive.
If you have the urn’s paperwork, product listing, or a manufacturer card, that information often tells you whether the closure is threaded, screwed, or sealed. If you purchased the urn online, you can also compare it to similar options in collections like cremation urns for ashes or keepsake urns for ashes to see how closures are typically described.
Safe Ways to Check the Seal Without Opening the Urn
Sometimes you do not actually need to open the urn—you just want reassurance that it is secure. You can usually do that without breaking any seal.
Start by holding the urn over a soft, clean surface (a folded towel on a table). Gently try to rotate the lid area with your palm, using almost no force. If it moves freely, you likely have a threaded lid that is not tightened. If it does not move at all, that can mean it is simply tight, or it can mean it is locked (set screw) or glued (adhesive). Do not escalate beyond “gentle hand pressure” at this stage.
Next, look for gaps. A properly seated threaded lid usually meets the body evenly, without an obvious “tilt.” With set screws, you may see a very clean seam but a tiny screw hole. With adhesive seals, you may see a thin line of dried adhesive or feel a slightly rough edge where the adhesive cured.
If you hear or feel shifting inside the urn when you tip it slightly, that does not necessarily mean the seal is compromised. Ashes are commonly inside a sealed bag. But if you hear a lid rattle, or you see the lid lifting slightly from the body, that is a sign to stop and ask for help rather than trying to “tighten it yourself” blindly.
Threaded Lids: The Most Common “Screw-Top” Closure
If the urn has a threaded lid, you are dealing with screw top urn opening rather than a glue seal or locking screw. Most threaded urn lids loosen by turning counterclockwise. The key is to increase grip, not force.
Set the urn on a towel so it cannot slide. Use dry hands or nitrile gloves for traction. If the surface is smooth (polished metal, glazed ceramic, or glass), a rubber jar-grip pad can help. Apply even pressure around the lid and try a slow, steady turn. Avoid quick twisting. Quick torque is what leads to slips, scratches, and drops.
If it still does not budge, a strap wrench can work well on metal urns, but it should be used cautiously. Protect the surface with a cloth between the strap and the urn. The moment you feel the urn body flex or the lid edge bite into the finish, stop. The goal is a controlled turn, not a wrestling match.
When the lid loosens, open it slowly and keep the opening pointed away from you. If you are opening the urn to divide ashes or transfer remains, it is worth reading Funeral.com’s step-by-step guide How to Transfer Ashes into a Cremation Urn before you begin, so you can plan for tools, containment, and clean handling.
Set Screws: How to Find Them and Open Without Stripping
Set screw closures are common because they add security without requiring adhesive. The problem is that the screw can be tiny and easy to miss. People often start twisting the lid aggressively, not realizing the lid is locked.
If you suspect a set screw, look closely around the rim and near decorative bands. The urn set screw location is often along the upper edge, sometimes slightly recessed. It may require a small Allen key (hex wrench) or a tiny flathead screwdriver.
If you locate the screw, the safest approach is to loosen it slightly, not remove it fully. Removing it completely increases the risk of losing it. Use the correct tool size; the wrong size is how screws get stripped. Once loosened, try the lid again with gentle, even pressure.
If you cannot see the screw but the lid will not turn at all and the seam looks extremely tight, do not pry. Prying is how decorative bands bend and ceramic rims chip. At that point, funeral home help opening urn is often the best next step, because a professional can identify the locking mechanism quickly and prevent permanent cosmetic damage.
Adhesive-Sealed Urns: What to Do When the Lid Is Glued
This is the scenario that triggers most anxious searches: how to open glued urn lid. Adhesive seals can range from light (a small bead of silicone meant to prevent loosening) to strong (epoxy meant to discourage reopening). The difficulty is that you cannot reliably tell which adhesive was used without seeing it, and different urn materials react differently to heat, solvents, and pressure.
If you suspect adhesive, assume you are in “high-risk for damage” territory. It is still sometimes possible to open the urn, but the safest first step is not force—it is information. If the urn came from a funeral home, call and ask whether they sealed it and how. If the urn was purchased online and then sealed by a family member or provider, ask what product was used. A tiny detail like “silicone” versus “epoxy” changes the risk profile dramatically.
If you cannot get that information and you still feel you must proceed, keep your attempts conservative. Avoid knives and screwdrivers. Avoid chemical solvents unless a professional specifically recommends them for that urn material. Avoid heat guns and open flame. On some urns, heat can discolor finishes, loosen decorative inlays, crack lacquer, or create thermal stress in glass and ceramic.
In practical terms, the best “home” attempt is often limited to improved grip (rubber pad, gloves) and slow, steady pressure. If the lid does not move with reasonable hand force, that is your stop sign. If you push beyond that, you are more likely to crack a ceramic lip, chip glass, dent a metal rim, or tear a gasket—turning a manageable situation into an urgent one.
Material Matters: Metal, Ceramic, and Glass Need Different Caution
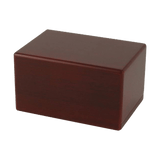
Metal urns
Metal urns are generally the most forgiving for controlled tools like strap wrenches, but they can still dent, scratch, or distort at the rim. Distortion is especially problematic because it can make re-sealing difficult. If you are planning to re-close the urn afterward, keep pressure even and avoid gripping directly on engraved areas.
Ceramic urns
Ceramic urns can be strong but brittle at edges. Chipping often happens at the lip where the lid meets the body. If the lid is stuck, avoid prying at the seam. Even a small chip can be emotionally upsetting, and it may also create a less secure closure afterward. With ceramic, the threshold for “stop and call a professional” should be lower.
Glass urns
Glass urns are beautiful and often chosen as display pieces, but they are least tolerant of twisting force and temperature changes. If you are dealing with a sealed or stuck lid on glass, it is generally wise to stop early and ask for professional assistance rather than escalating grip tools.
Keepsake Urns and Small Compartments: Opening Without Over-Tightening
Many families do not need to open the main urn at all; they only need a small portion for sharing. That is where small cremation urns and keepsake urns come in, and it is also where the question keepsake urn how to open becomes relevant. Keepsake urns often have smaller threads, smaller lids, and less leverage—so people tend to overtighten without realizing it.
If you are opening a keepsake urn, treat it like fine jewelry rather than hardware. Stabilize it on a towel. Use a rubber grip. Turn slowly. If the keepsake urn is part of a larger plan—sharing ashes among siblings, placing a portion with a loved one, or preparing for cremation jewelry—it can be helpful to browse the range of options in keepsake urns for ashes and small cremation urns for ashes, so your “portion plan” matches the container size and closure style.
When to Stop and Ask for Help
It is reasonable to ask, can you unseal an urn? Sometimes yes. But the safest and most respectful outcome is not always “I did it myself.” If any of the following is true, pause and hand it off to a professional:
- You suspect adhesive and the lid will not move with gentle grip and steady pressure.
- You cannot identify the closure type, but the urn resists all movement.
- You see cracking, flaking, or stress at the rim (especially ceramic or glass).
- You need the urn to remain cosmetically perfect for display or a niche.
- You need to re-seal the urn securely afterward and want it done cleanly.
A funeral home can often open and re-secure a stuck lid quickly, and they may also be able to help you divide ashes into multiple containers with minimal mess. If your goal is memorial jewelry, a jeweler or memorial provider may also be the right expert—especially if you are working with pieces from Funeral.com’s cremation jewelry collection or cremation necklaces. If you want an overview of jewelry types and what is realistic to do at home, start with Cremation Jewelry 101.
Resealing After You Open It
Once you open an urn, you may want it “closed for good” again. With threaded lids and set screws, that is usually straightforward: close gently, ensure the seam is even, then secure the set screw if present. With adhesive, resealing should be done thoughtfully. Household glues are not automatically safer, and they are not automatically more respectful. Some adhesives off-gas, some discolor, and some permanently bond in ways that make future professional handling harder.
If the urn will be displayed at home, you may find you do not need adhesive at all—only a properly tightened lid and sensible placement. Funeral.com’s guide Keeping Ashes at Home: How to Do It Safely, Respectfully, and Legally can help you think through stability, household safety, and how to make the memorial space feel settled without overcomplicating the mechanics.
How This Fits Into the Bigger Cremation Plan
Opening a sealed urn is rarely the “real” goal. The real goal is usually something tender: sharing, honoring, traveling, or settling on what feels right. That is why it helps to connect the technical decision back to your broader funeral planning. If you are still deciding on the “right” container for your plans, the guide How to Choose a Cremation Urn That Actually Fits Your Plans is built around real scenarios like home display, burial, scattering, and travel.
Cost can also be part of the story, especially if you are balancing multiple family needs. The National Funeral Directors Association lists national median costs (including $8,300 for a funeral with viewing and burial in 2023 and $6,280 for a funeral with cremation). If you want a family-friendly breakdown focused on cremation, Funeral.com’s how much does cremation cost guide is a helpful next read.
If your next step is scattering or water burial, planning the right container and closure becomes even more important. For scattering guidance, see An In-Depth Guide to Scattering Cremation Ashes from an Urn. For sea or water ceremonies specifically, Understanding What Happens During a Water Burial Ceremony can help you picture what the day involves so the urn choice supports the moment rather than complicates it.
And if the ashes you are caring for are a beloved pet’s, the same caution applies—sometimes even more so, because pet urns are often display-forward and emotionally significant. When families share pet ashes among household members, they often pair a main urn with smaller keepsakes. If that is your situation, you may want to explore pet cremation urns, specialty designs like pet figurine cremation urns, and shareable options like pet keepsake cremation urns.
A Final Word of Permission
It is okay to want reassurance. It is okay to want to check a seal. It is okay to need access because your family’s plan changed. What matters is that you move slowly, choose the least-risk path first, and stop when the urn is telling you, “This is not a home project.” The most respectful choice is the one that keeps the remains secure, protects the memorial, and leaves you with fewer regrets—whether that means opening the urn carefully yourself, or asking a funeral home or jeweler to help you do it safely.


