


Cremation Ashes: Handling, Storage, and Memorial Options Guide
Imagine holding a container that feels heavier than it looks—the weight isn’t just physical, but emotional too. That’s where many of us find ourselves after a loved one’s cremation. Welcome to the Funeral.com podcast, where we turn uncertainty into clarity and help you navigate the real, hands-on side of remembrance. Today, I’ll guide you step-by-step through putting ashes in an urn—without a mess, and without overwhelm.
If you’re thinking, 'How do I do this respectfully? What tools do I need? Will I make a mistake?'—you’re not alone. With U.S. cremation rates projected at 63.4% in 2025, more families are facing these questions than ever before. I’ll explain terms like 'cremated remains' (which is just a technical way to say 'ashes') and 'temporary container' (think of it as the starter home before the urn).
Here’s our roadmap: we’ll cover what you get after cremation, how to set up for a clean transfer, step-by-step urn filling, keepsake division, sealing, paperwork, and what comes next—at home or during scattering. By the end, you’ll have practical tips, peace of mind, and the confidence to handle this gentle task on your own terms.
Ready to demystify this process? Let’s begin with what you actually receive when you bring ashes home—and why that matters for your next steps.
What You Receive: Decoding Containers, Bags, and Paperwork
So, what exactly comes home from the crematory? Usually, it’s a plastic bag inside a rigid temporary container—sometimes called a 'temporary urn.' You might also receive an ID tag and official paperwork, such as a cremation certificate. It’s easy to feel lost with all these new terms. Think of the temporary container like moving boxes: functional, not final.
You may hear 'cremains' or 'cremated remains'; both are industry terms for ashes. The ashes themselves are typically fine and powdery, with some small bone fragments—nothing dangerous, but surprisingly light and dusty. I know you might be thinking, 'Is it safe to touch? Will it spill everywhere?' Relax, take your time, and know that the real mess usually happens if you rush or open things over carpet.
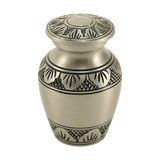
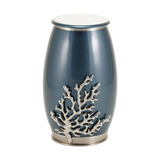
Paperwork matters too. Keep the cremation certificate and any ID tags together—they’re like your passport and boarding pass for future travel or cemetery arrangements. And if you’re choosing an urn, consider the opening style (threaded lid or panel with screws)—it shapes your whole filling process.
Before we dive into the transfer, let’s talk about setting up your workspace—because a calm setup is half the battle.
Setting Up: Tools, Workspace, and the Art of Spill Prevention
Let’s get practical. Before you even open the ashes bag, your setup can make or break the experience. Choose a hard surface—kitchen table beats couch every time. Cover it with butcher paper or a plastic tablecloth to catch stray dust. If you’ve got a tray or shallow bin, that’s your new command center—think of it as your safety net.
Now for tools. A wide-mouth funnel (or a special urn filling kit) is like using a pitcher instead of pouring from a bucket—precision without the nerves. Disposable gloves can help keep things tidy, and painter’s tape is your secret weapon for holding the funnel steady. Keep a scoop or spoon handy for portioning, and zip-top bags or small cups if you’re dividing ashes into keepsakes.
You might wonder, 'Do I really need all this?' Here’s the analogy: you wouldn’t paint a room without drop cloths, right? The same principle applies here. Turn off fans, keep pets and kids out, and allow yourself to pause if you get emotional—there’s no medal for speed.
Once you’re set up, it’s time for the main event: the actual transfer. Let’s walk through it, step by steady step.
Transferring Ashes: Step-By-Step, Mess-Free, and Mindful
Here’s where most people get nervous—but you don’t have to. Start by stabilizing the urn in your tray. If it’s tall or narrow, nestle it in a bowl or towel so it won’t tip—think of it like anchoring a vase before pouring water.
Carefully remove the temporary container’s lid. Inside, you’ll find a sealed bag—don’t open it yet. Check your urn’s opening: is it a wide threaded top, a press-fit lid, or a bottom panel with screws? If it’s narrow, use your funnel. Tape it in place if you need extra hands.
Now, 'the small corner method'—snip just a tiny corner of the bag for a slow, controlled pour. It’s like those sugar packets that only let out a trickle. Bring the bag close to the funnel and pour slowly; if ashes bridge in the funnel, tap gently or use a spoon. Stop before you reach the top—leave room for the lid.
Before sealing, wipe the rim clean. For threaded lids or gaskets, dust on the threads can cause leaks. When you’re done, close the urn securely but don’t overtighten. Take a breath—you’ve just handled one of the most tender parts of the journey.
Keepsakes, Jewelry, and Sealing: Sharing and Securing with Care
Dividing ashes into keepsakes or jewelry? The same slow, steady approach applies—but scale it down. For keepsake urns, portion into labeled paper cups or small bags first. This way, you avoid the mid-task panic of ‘Did I already fill this one?’ It’s like meal prepping, but with sacred intentions.
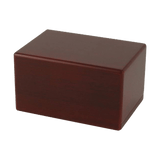
Cremation jewelry takes real precision—these tiny chambers hold just a pinch. Use a mini funnel and work over your tray, maybe even ask a trusted helper to steady the piece. For pet urns, the process feels the same, but the emotional current can be unexpectedly strong. Choose a vessel that reflects your companion’s personality—figurines, photo boxes, or classic urns all work.
Now, sealing the urn. Threaded lids and screw panels are designed for easy reopening—great if you plan to scatter or share ashes later. For permanent closure, a bead of clear silicone along the rim is the industry standard—think of it as caulking a window for weatherproofing: secure, but not irreversible if plans change.
Still unsure about sealing or sharing? Pause, ask yourself what feels right for your family, and know you can revisit this choice. Now, let’s talk about the paperwork you’ll want to keep on hand—and why it can matter months or years down the line.
At Home, On the Move, or At Sea: Choices and Confidence for Next Steps
You’ve filled the urn—now what? Keeping ashes at home is common and perfectly legal in most places. The main safety tips: pick a stable spot, out of sunlight and dampness, where kids and pets can’t knock it over. Create a simple memorial—maybe a photo or candle nearby—to make it feel intentional, not temporary.
Thinking about scattering or water burial? Federal rules require ocean burials be at least three nautical miles offshore, and you must notify the EPA within 30 days. Biodegradable urns, like special dissolving containers, make water ceremonies gentle and eco-friendly. It’s like using a compostable plate at a picnic—environmentally sound, designed to disappear.
Traveling with ashes? TSA guidelines say the urn must pass X-ray screening, so non-metal containers are best. Think of it like packing for a flight: some containers breeze through security, others set off alarms. Always bring your cremation certificate and check airline policies ahead of time.
If you’re still 'living in the in-between'—not sure if you’ll keep, share, or scatter—that’s perfectly normal. Take the time you need, knowing every option remains open as grief and memories evolve.
Closing Thoughts: Three Keys, One Next Step, and Permission to Pause
If you remember just three things today, let it be this: first, a thoughtful setup and slow process prevent nearly every mess; second, your choice of vessel and closure style can always match your evolving plans; and third, there’s no rule saying you have to decide everything on day one.
Here’s a concrete action step: gather your tools—a tray, funnel, cloth, and workspace covering—before you start. Just prepping your space makes the rest feel manageable. Still feeling stuck? Imagine a friend asking, 'Am I doing this right?' Remind them—and yourself—there’s no single 'right way,' only what brings you peace.
We covered technical terms like 'gasketed closure' (think of a rubber seal on a thermos) and 'biodegradable urn' (like a compostable cup for the ocean). You now have a toolkit—practical and emotional—to handle this journey with confidence.
“Thanks for listening to the Funeral.com podcast. For trusted resources, memorial products, and planning support, visit Funeral.com. Follow us for more expert insights and meaningful conversations about honoring life.”


